1,750 PCB Hacker Badges at Hack The North 2026
How a cardstock name tag became 1,750 programmable circuit boards, and everything that went wrong along the way.
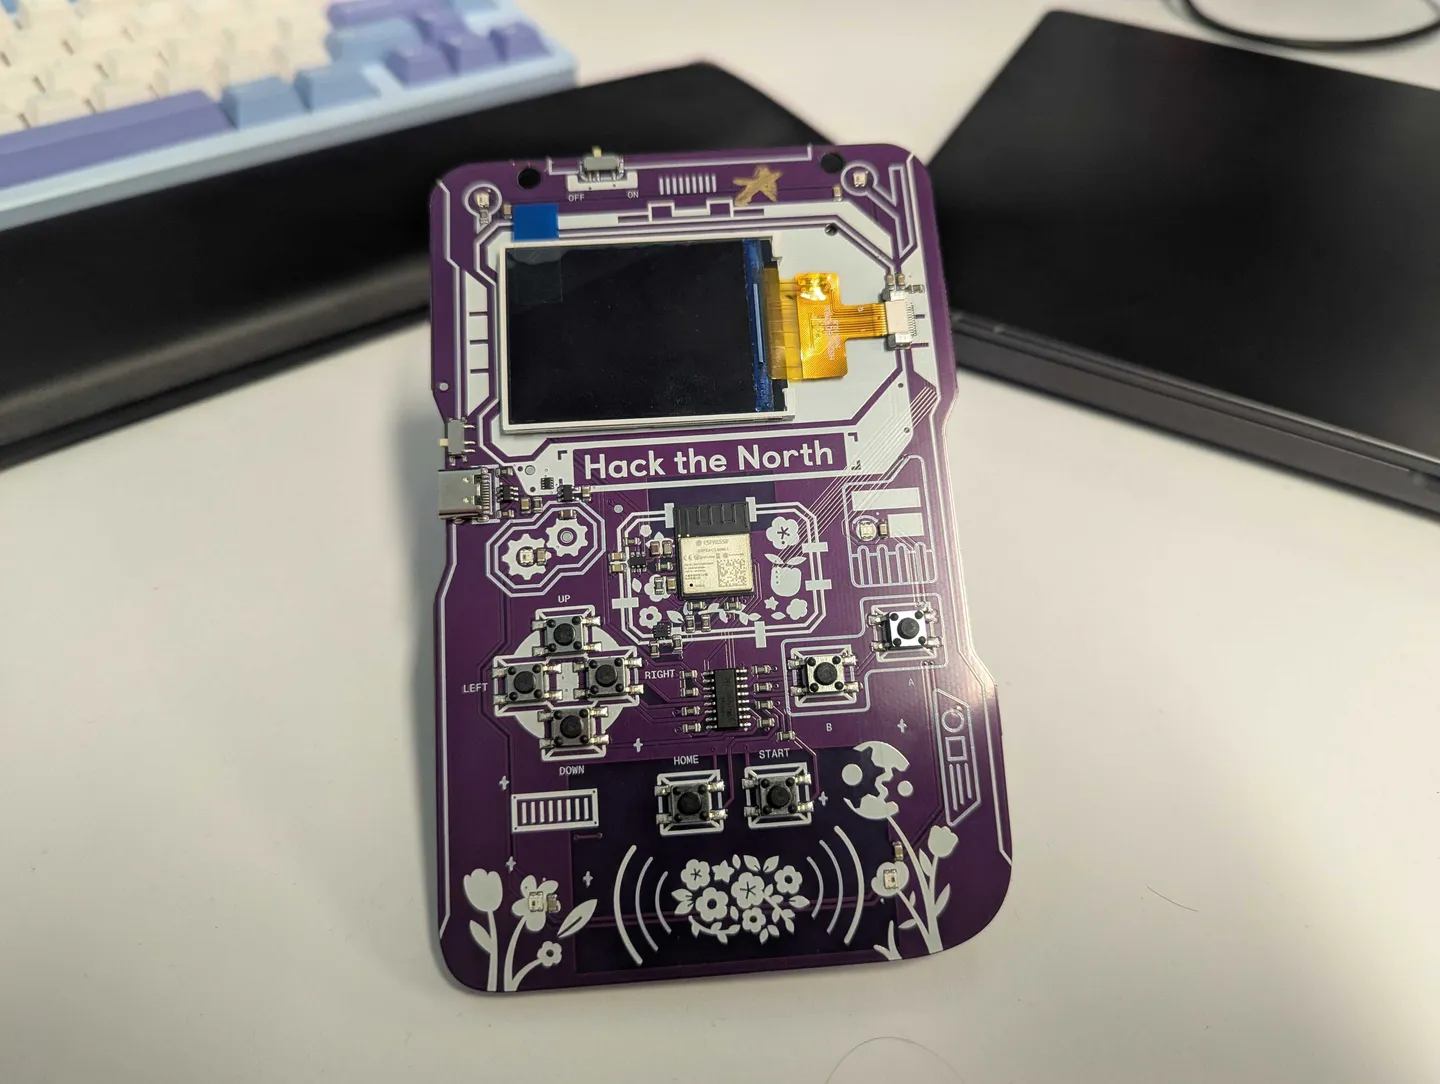
At most hackathons, your badge is a piece of cardstock on a lanyard. This year at Hack the North, Canada’s biggest hackathon, it was a circuit board with a screen, buttons, and a radio, and you could program it to do whatever you wanted.
On the Saturday, a team walked up to me holding four of them. They’d turned them into a working game of Among Us.
Eight months earlier, our badges were going to be made of cardstock too.
Why not cardstock
In mid January, my friend Alex (a PM at Hack the North) asked if I wanted to join Hack the North. The moment I got that message, a vision popped into my head. What if we brought the badge culture of cybersecurity events into the world of hackathons. What if we made a wave so big other hackathon organizers couldn’t ignore it. What if we brought hardware badges into the mainstream of hackathons. This was our goal.
I quickly put together a deck and pitched the idea to the organizing team.
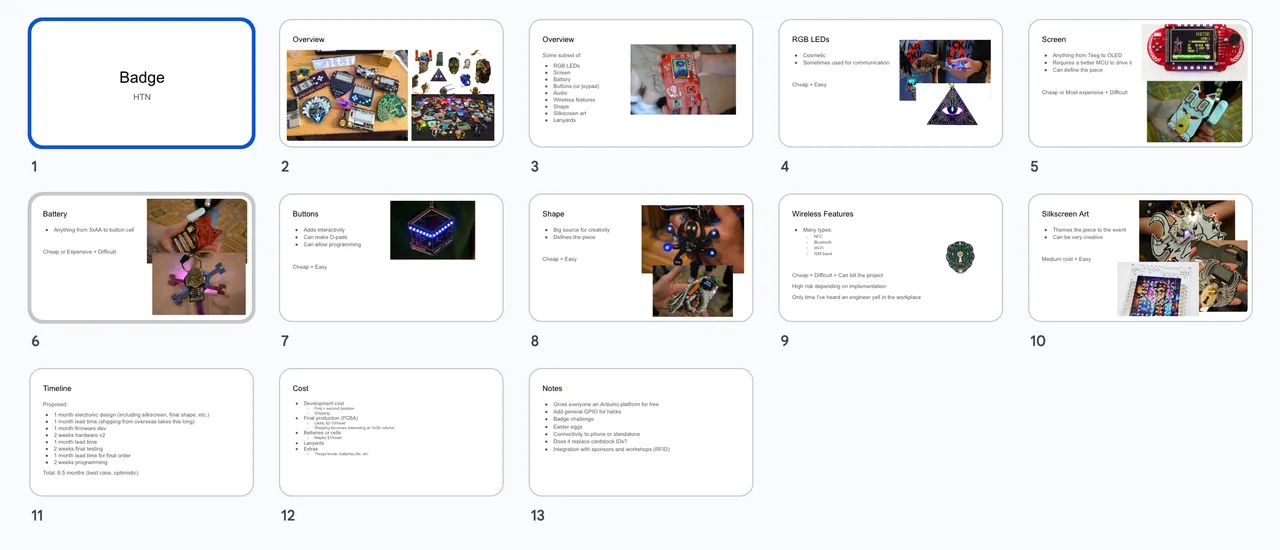
Here’s the executive summary:
- LEDs (as many as we can fit)
- Screen
- Battery
- Buttons
- Audio
- Wireless features
- Cool shape
- Silkscreen art
- Lanyards
Oh, and all for $5 / head (boy was I naive).
I made it super clear that we’d need multiple hardware iterations to de-risk and guarantee the success of this project. We initially scoped for an EVT (Engineering Validation Test), DVT (Design Validation Test), and 2-3 PVTs (Production Validation Test). We wound up shipping in four iterations, with the fourth being our production run.
Built into the original pitch was an escape hatch to rapidly de-scope to blank badges, meaning ordering the badges without the components assembled which would drastically reduce cost. Without this safety net, I don’t think this project would have taken off. The directors, very understandably, did not want this project to (perhaps literally) blow up in our faces. (This was indeed a real risk we considered. Battery safety must be taken seriously.)
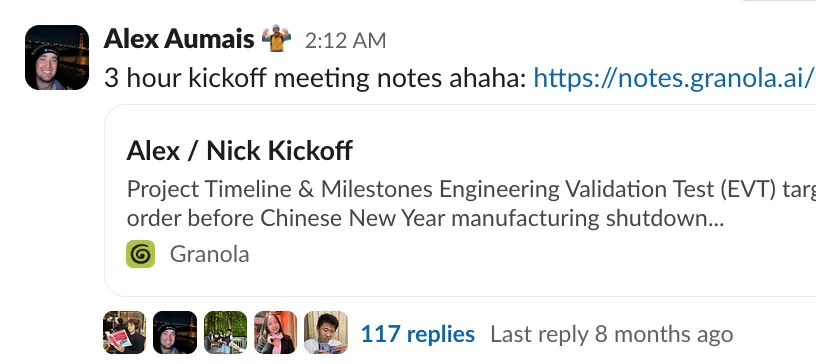
The initial kickoff meeting ran quite late. As you can see we had quite a few messages in the thread too ranging from reasonable concerns to brilliant ideas!
Engineering Validation Test (EVT)
I had so much energy going into the initial schematic. It’s like the initial development of a software side project: pure forward development with no scaling problems, bugs, or tech debt. It didn’t have to be pretty, the primary goal was to prove the parts work together.
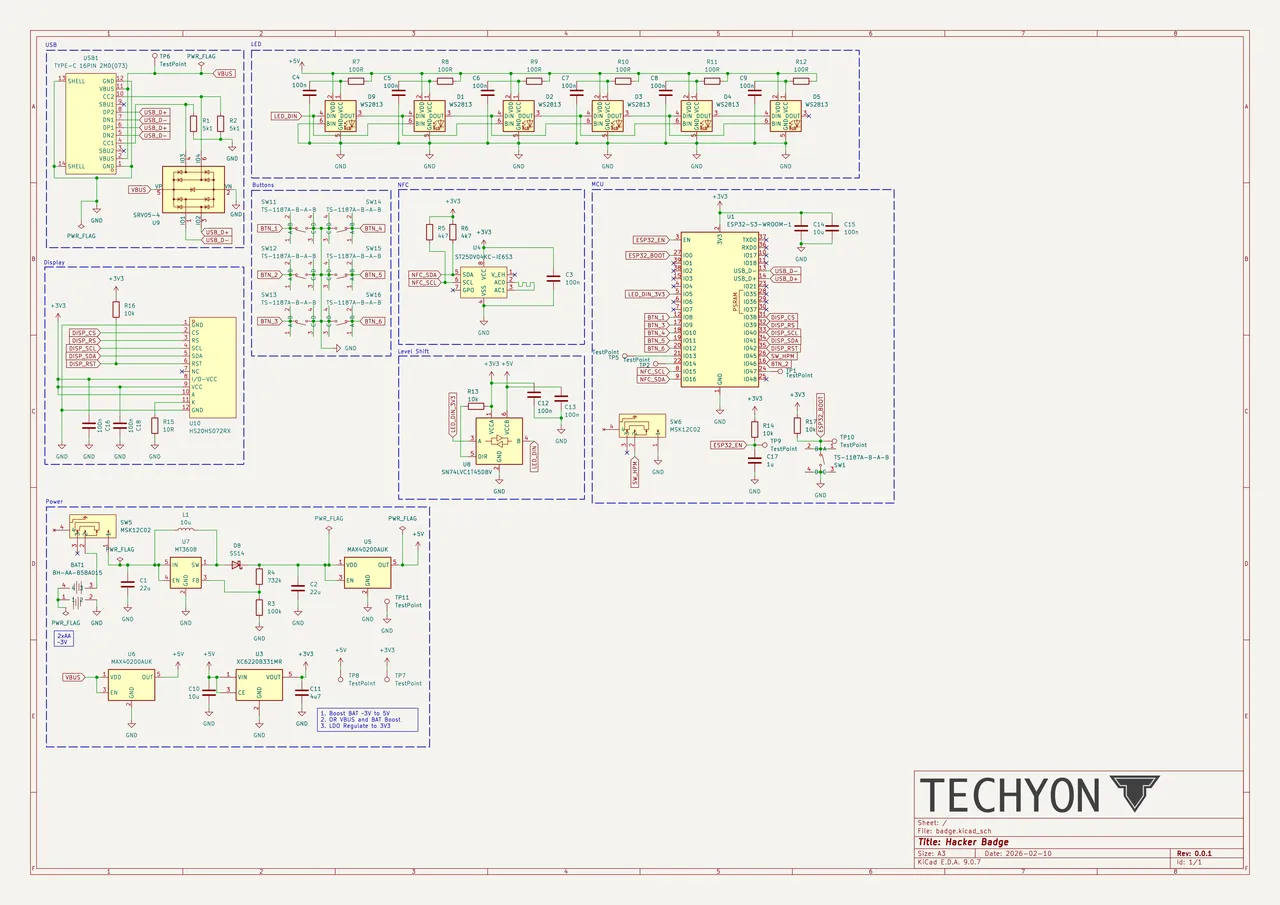
Here is our first schematic iteration! We’ll get into all the mistakes I made soon.
As for layout, well, I kinda took charge on it and of course went for the timeless classic: the hexagon. Why? Because HEXAGONS are the BESTAGONS.
EVT layout
-
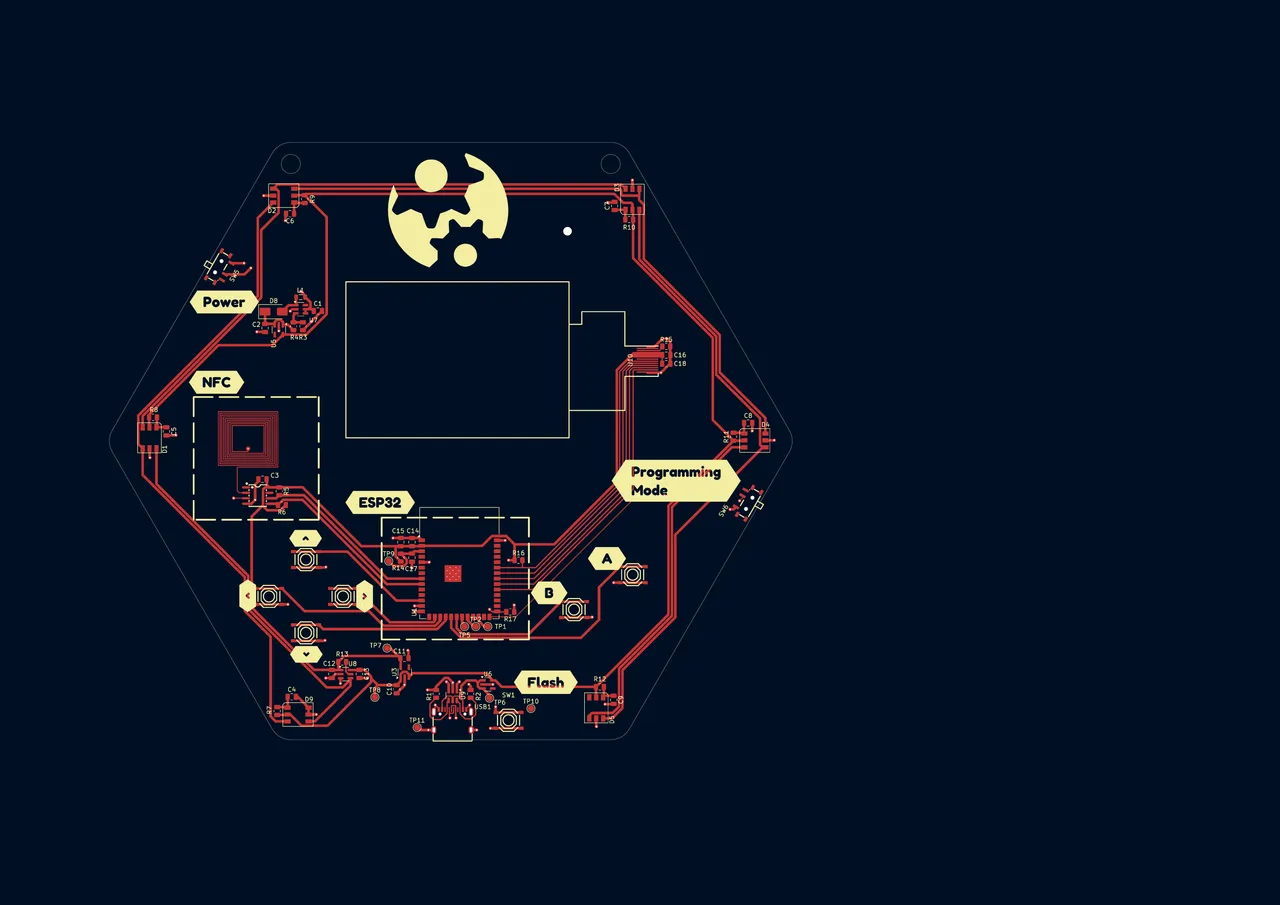
EVT front — the hexagon, with every block called out -
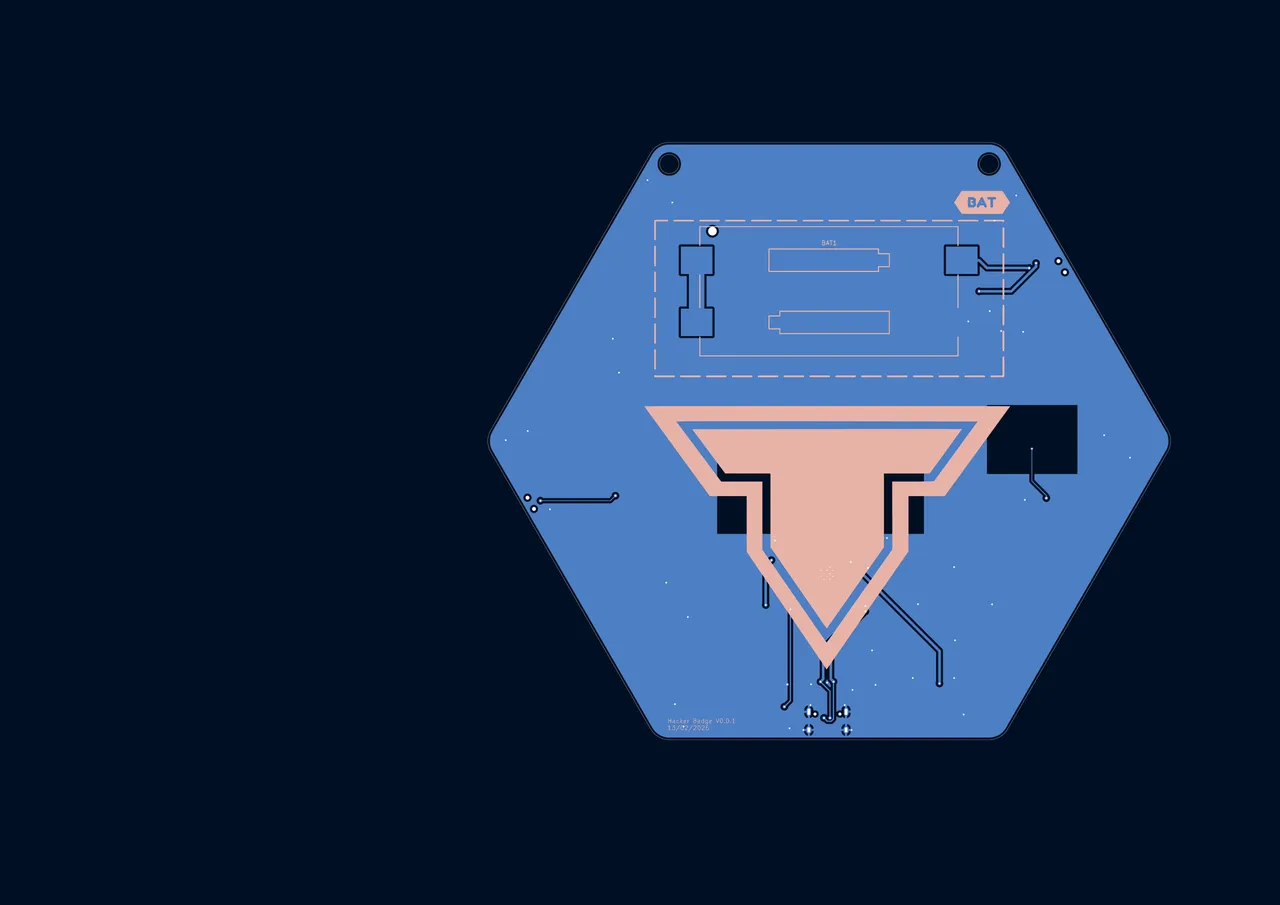
EVT back — battery holder and bottom-layer routing
The team were not hexagon ball knowers unfortunately.
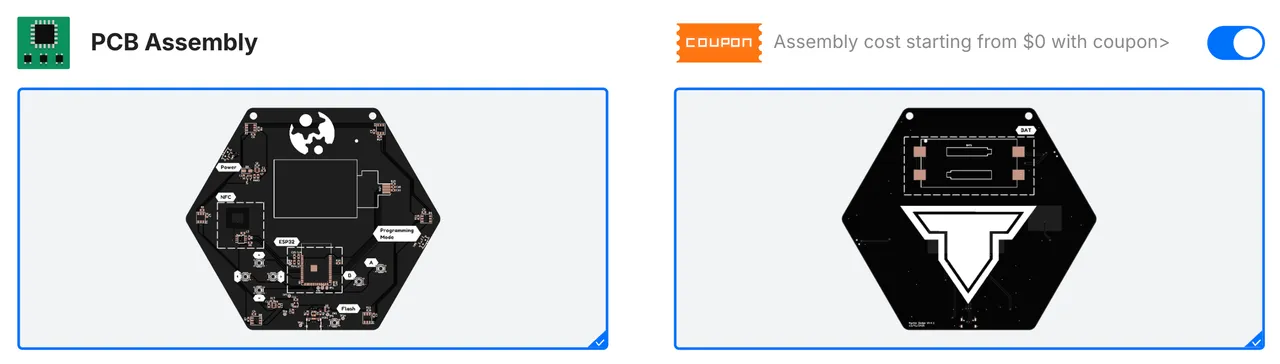
The hexagons stuck around as an engineering test, but the ill fated shape would be killed off in the next iteration. We placed the order on February 15th using JLCPCB, our manufacturing partner in China.
A few issues ensued:
Part selection error
On USB, everything worked. On battery power, nothing. The culprit was in the part selector list:
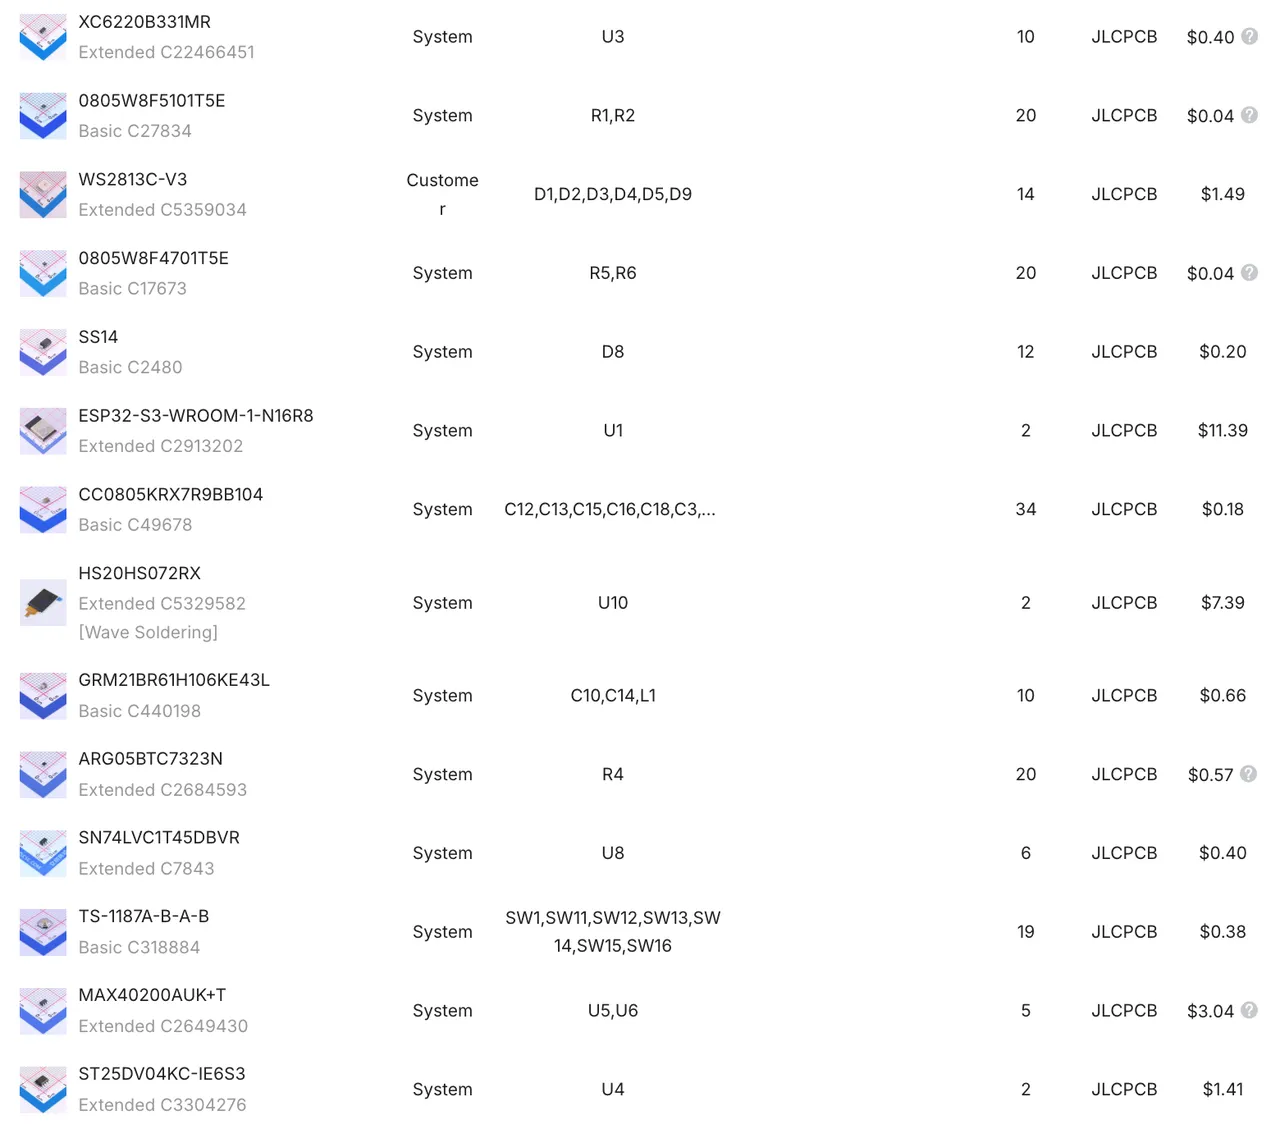
Can you spot it? C10, C14, and L1 are on the same line. 😱 I labelled capacitors C10 and C14 as “10u”, meaning 10 microfarads. Unfortunately, I also labelled L1 “10u”, which tricked the part finder into giving me a 10uF capacitor in the place of a 10uH inductor. The opposite of what I wanted!
This was a quick fix. We took a note to not make this mistake again, and on the EVT we were able to just short the inductor and it worked.
Lesson
Write unambiguous values (10uH instead of 10u). Don’t blindly trust the part finder. Check twice.
Pins too dense to solder
Most small screens come with a thin ribbon cable hanging off them, called an FPC (flexible printed circuit). The normal way to attach one is with a small connector on the board: slide the ribbon in, flip the latch closed. We decided to skimp out on the connector. The plan was to stick the screen down with adhesive and solder the ribbon’s contacts straight onto pads on the board, saving about five cents a badge.
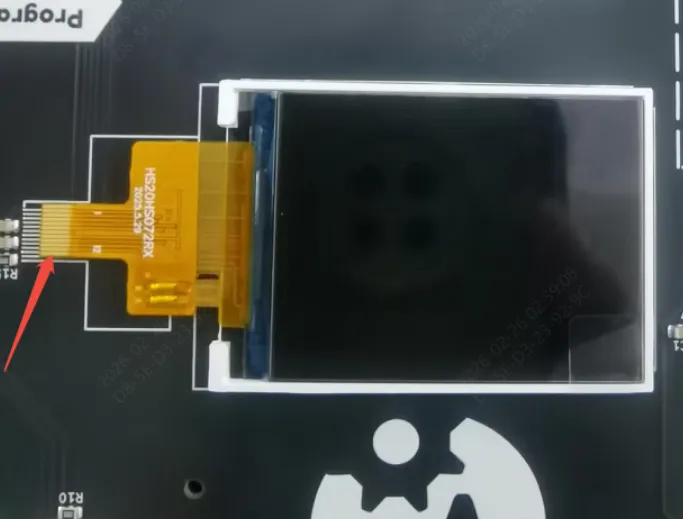
Any experienced hardware engineer reading this is wincing. A soldered ribbon is hard to assemble reliably, and once it’s on, replacing a cracked screen requires hot air and a very steady hand. With 1,750 badges at a hackathon, some screens were going to crack.
I knew this was the riskiest part of the assembly. I just wanted to see if we could get away with it. Turns out: nope! About ten days after we ordered, JLCPCB emailed to say the pins were too dense to solder. They offered me two options: leave the screens off entirely, or pick a different part.
I cooked up a third idea. The FPC connector I should have used from the start happened to fit the pads I’d already laid out for the ribbon. JLCPCB soldered the connector onto those pads, plugged the screen into it, and taped it down, all for an extra $4.25. We got lucky, and that connector solution stayed with us until the very end.
Lesson
Don’t ship manufacturing problems off to the manufacturer. Own them, figure them out, and be clear with them.
Then, a few days later…
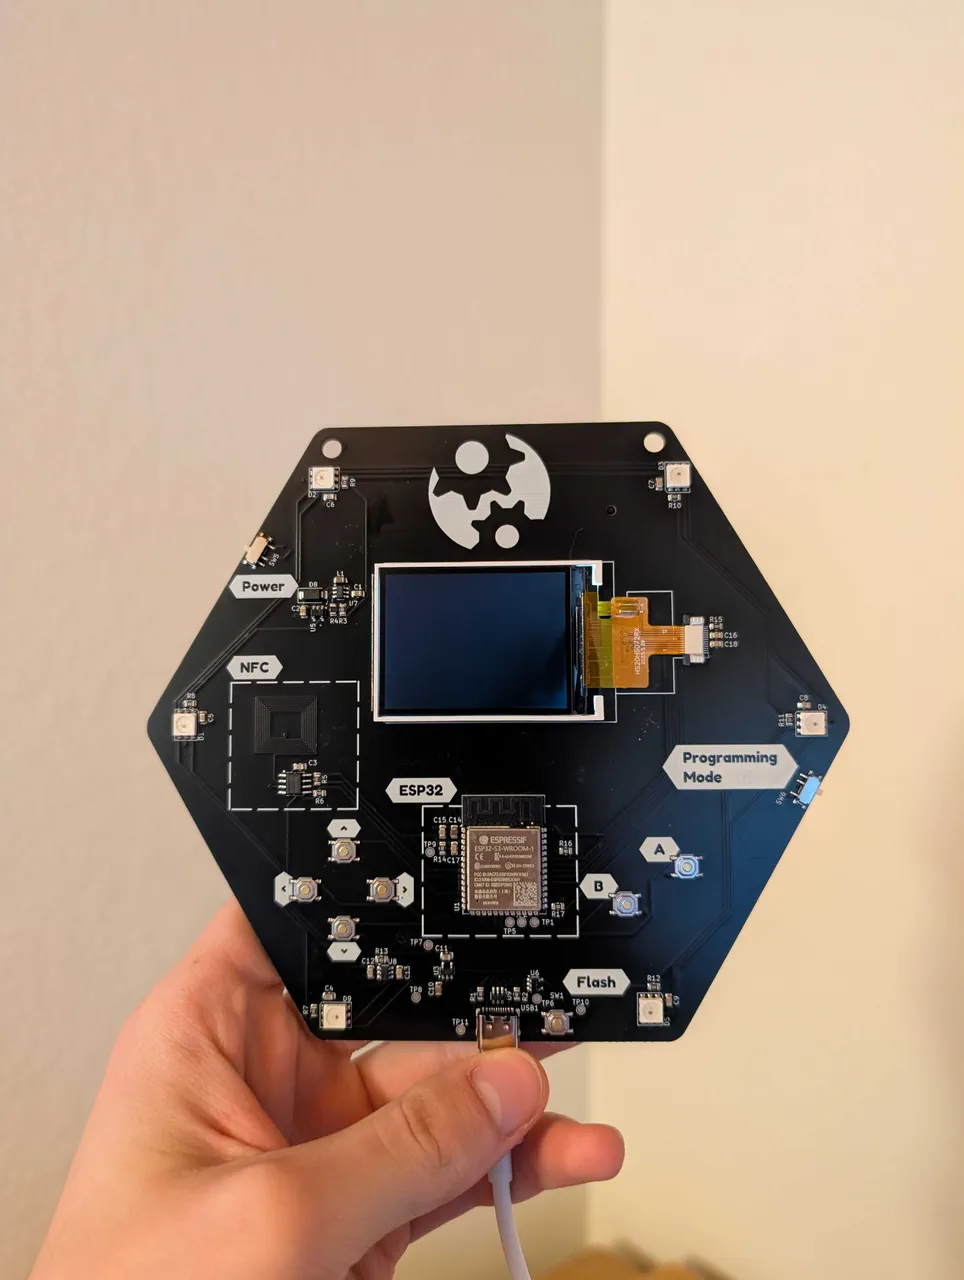
The badge is real!
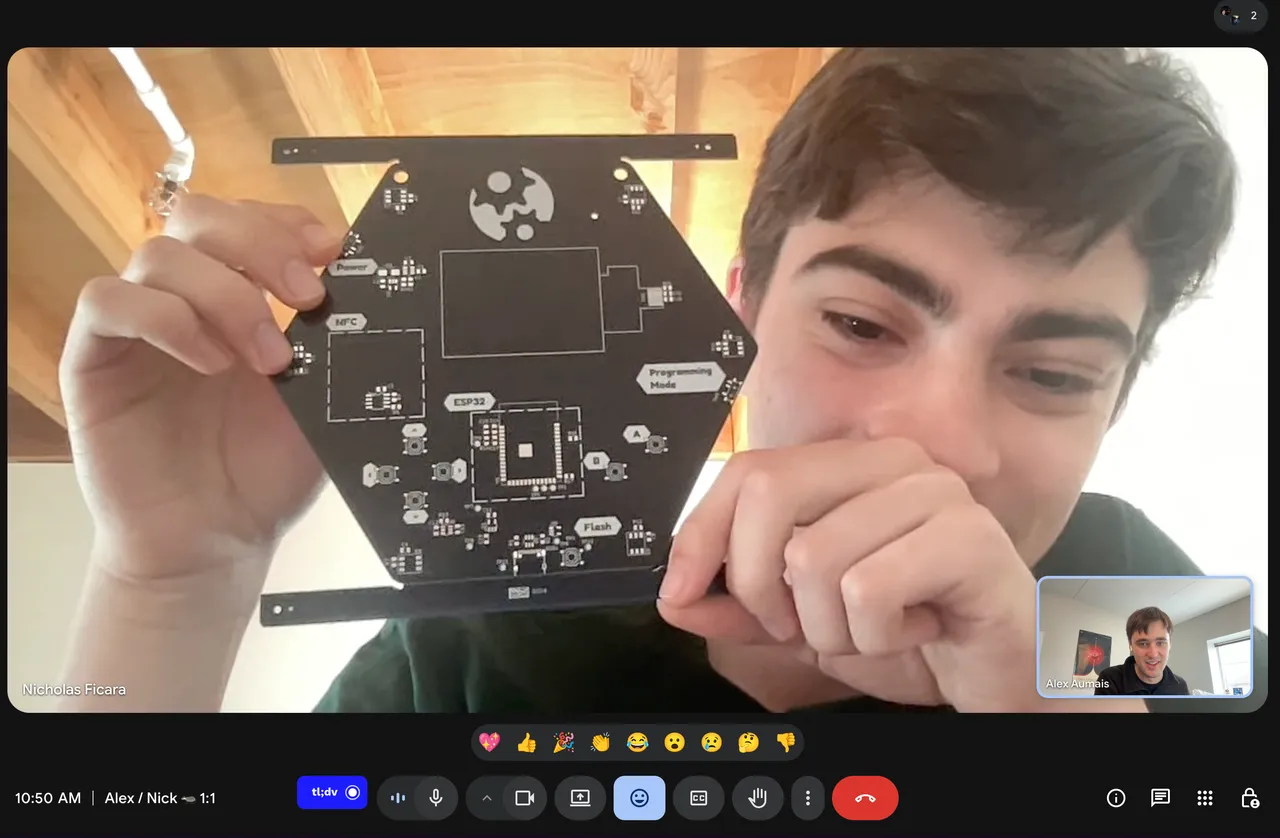
We hopped right onto a call to chat about it.
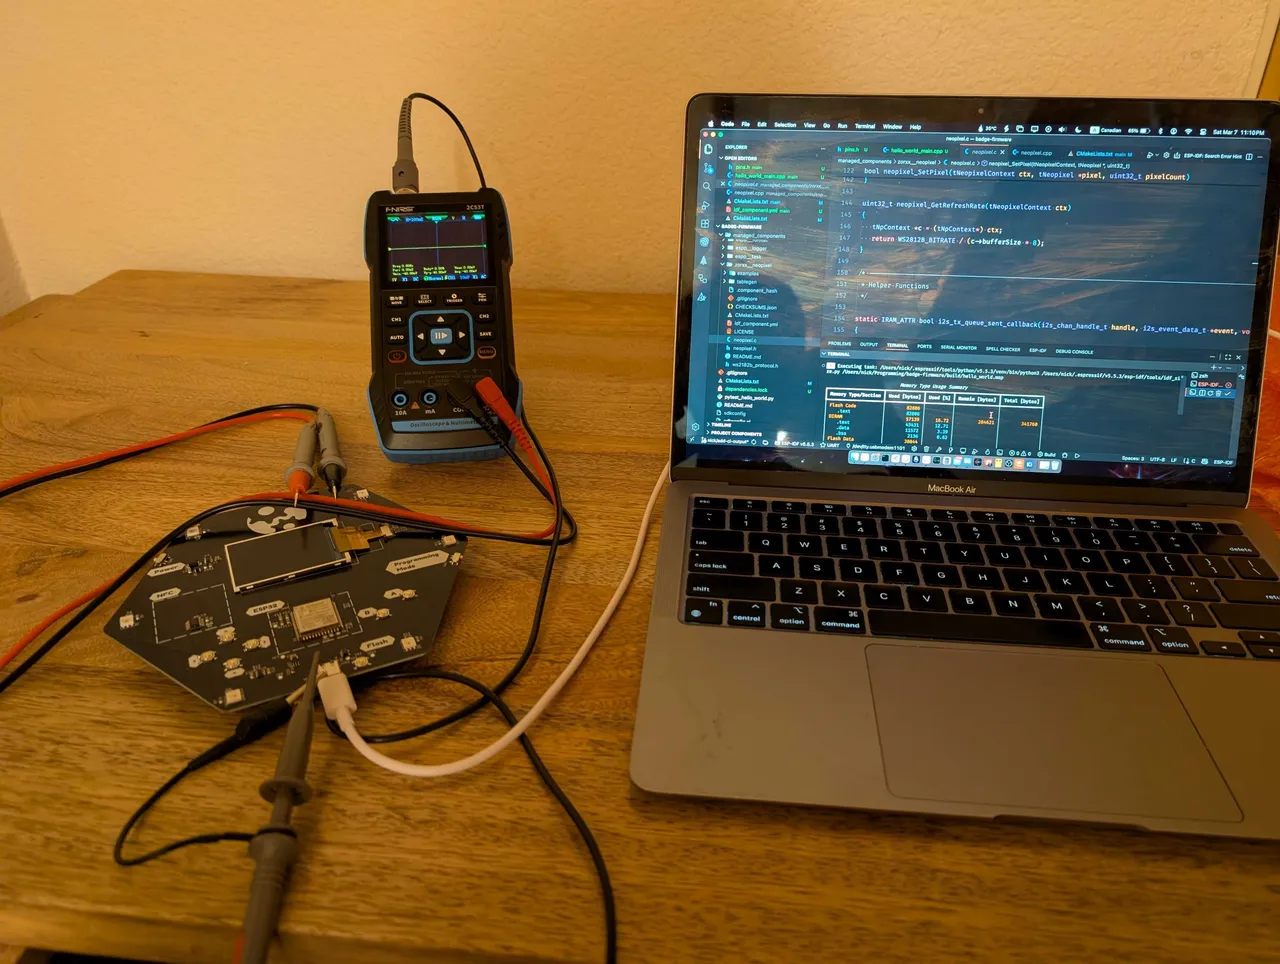
We started testing right away with some basic firmware. Keep in mind this was before the days of zero shotting this sort of thing with AI.
But did it work? Mostly!
Once we fixed the L1 inductor issue, all features on the badge worked except for NFC. And even NFC technically worked. It just did the wrong thing.
NFC chips come in two roles. A reader, like the one in your phone or a door’s card scanner, powers up a field and scans things. A tag, like the chip in a transit card or an NFC sticker, sits there passively and gets scanned. We wanted our badges to scan tags. The chip I’d picked was a tag. A phone could scan our badge, but the badge couldn’t scan anything itself.
What we really wanted was for two badges to tap together and swap contact details. That needs a chip that can switch between both roles, known as peer-to-peer mode, and those chips cost more than our budget allowed. In hindsight, badge-to-badge NFC was a bad idea anyway. NFC is finicky even with a well-tuned antenna, and ours was barely tuned. The ESP32 already had Bluetooth, which can do the same job without two strangers lining up their badges just right. So for the DVT, we switched to a reader chip for scanning tags and moved the badge bump to Bluetooth + accelerometer.
Lesson
Check that a chip does what you need before working out how to integrate it. The tag chip had all the right pins for our design, and that convinced me it was the right chip. ‘Twas not.
Design Validation Test (DVT)
The EVT proved that our parts worked. And the project as a whole was not crazy.
The DVT’s job was to prove that the design worked. This includes getting the real shape, real layout, and NFC chip that actually does what we wanted. Our DVT was best described as an EVT version two. Nonetheless, we had a Linear tracker to keep happy!
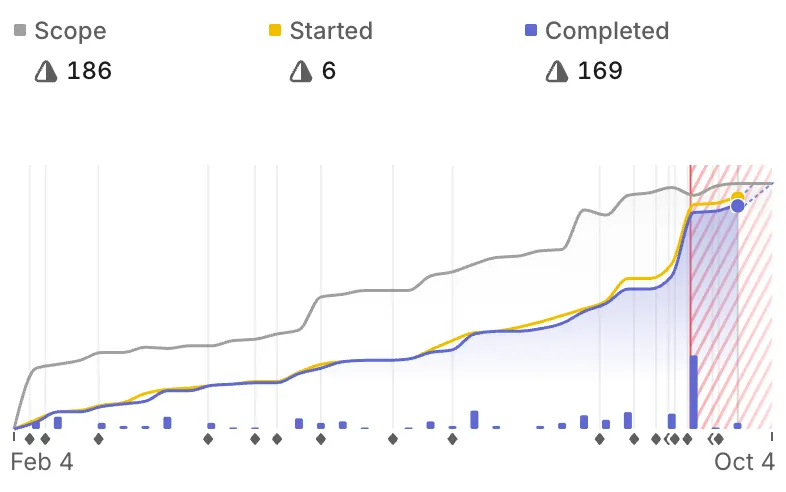
Fixing NFC
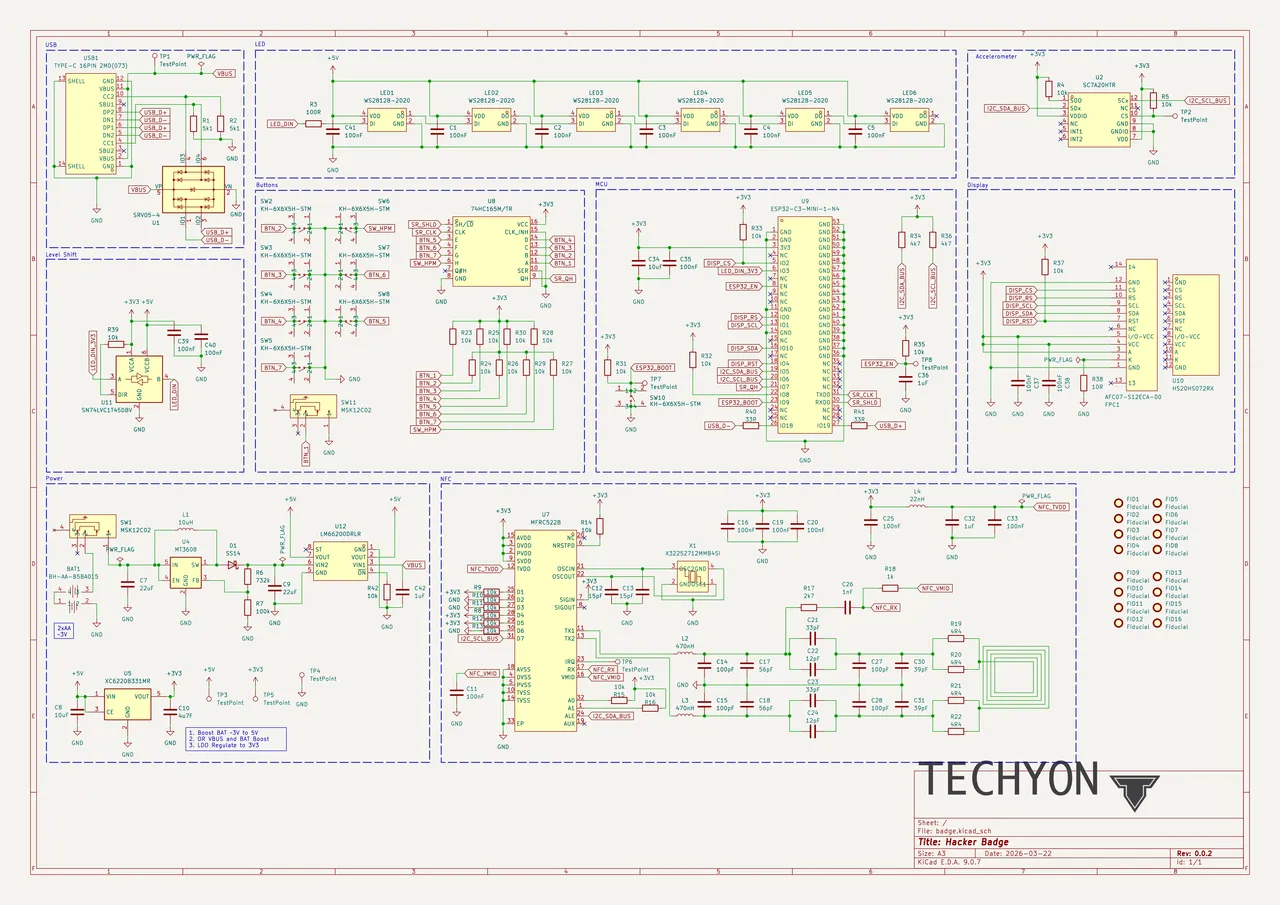
First priority was swapping the NFC tag for a reader chip. That turned out to be more than a part swap. The new chip expected a different antenna, and we had neither the tools nor the time to tune a custom one, so I copied the manufacturer’s reference design as closely as I could.
Here was the finalized schematic:
Shape and Layout
Now for the fun part. I had the pleasure of working with two very talented designers, which was fortunate, because my PCB art skills are… brutalist.
The first thing we settled was shape. We wanted something you’d hold like a handheld game console. Not unlike one released in 1989 that I may have written an emulator for at one point.
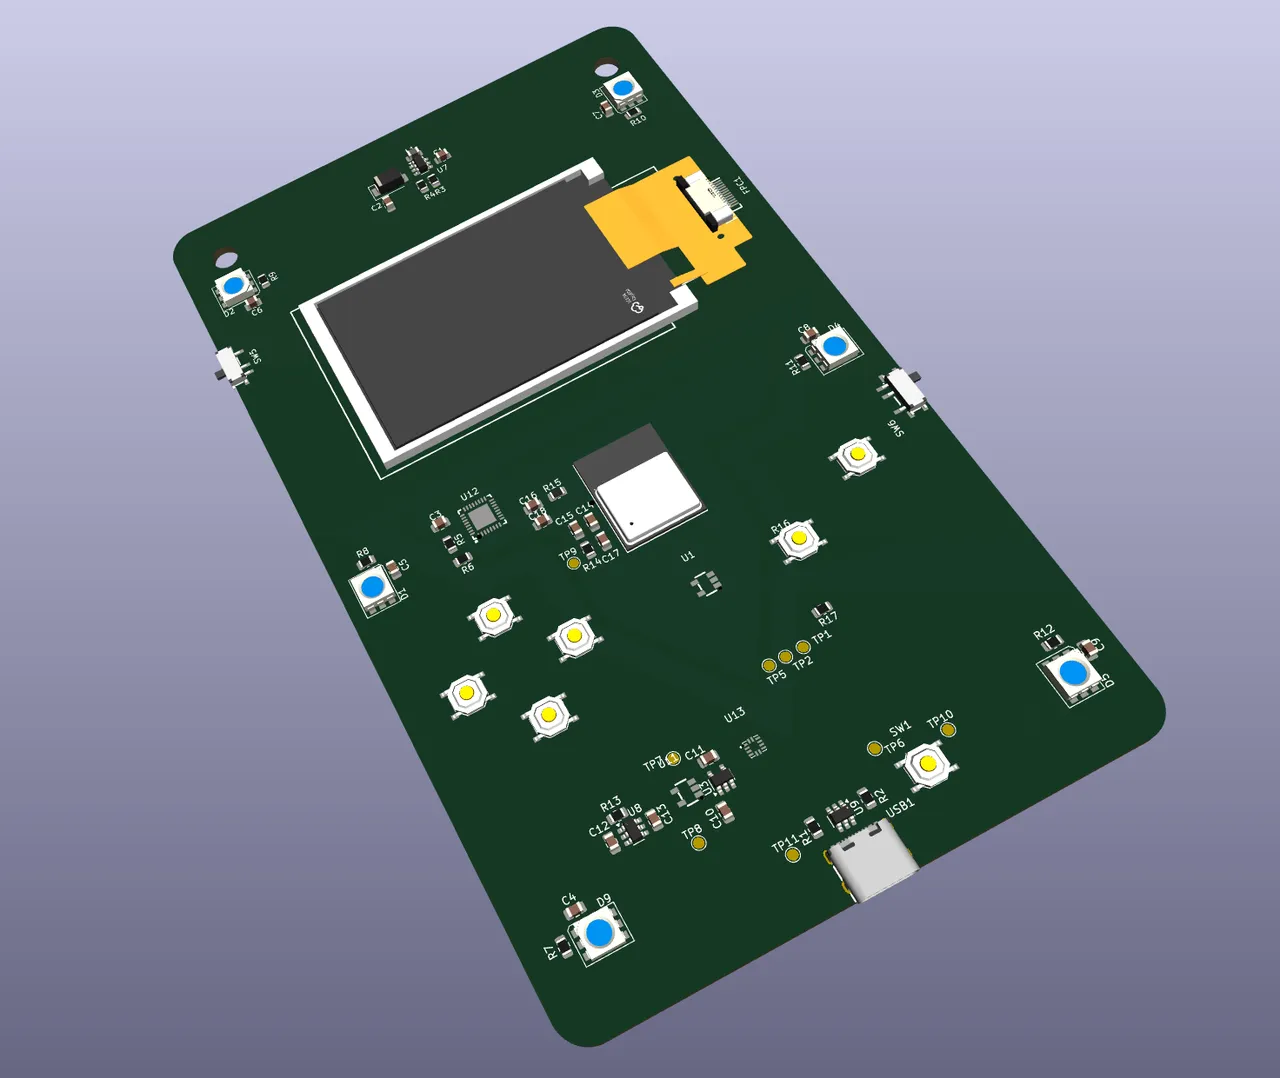
Then came the art, and the design team went all out with colour silkscreen:
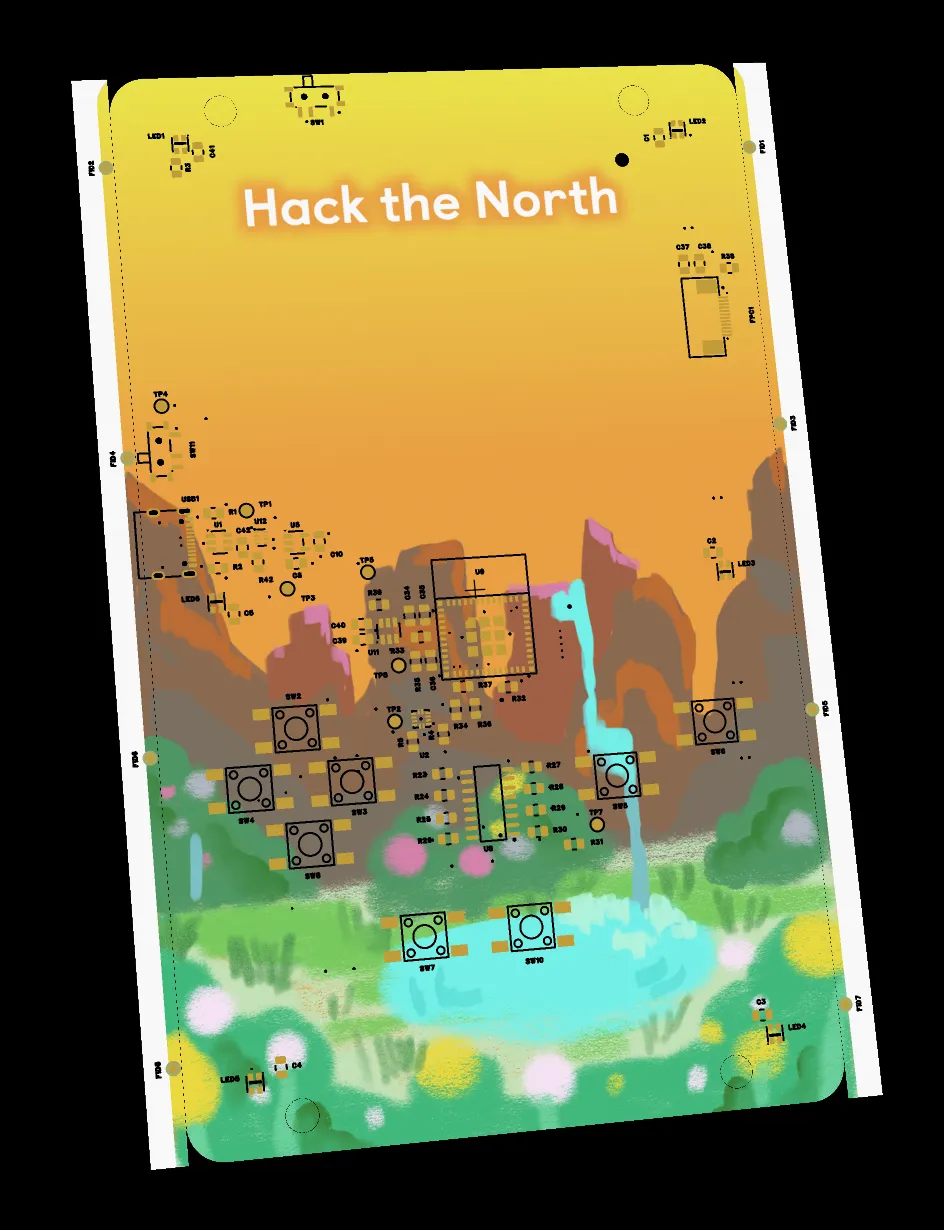
Now, the astute reader will notice we had single colour (white) silkscreen badges in the end.
JLC offers a colour silkscreen service, but there’s a catch: you have to use EasyEDA. We’d been using KiCAD. No problem, we thought, we’ll just import into EasyEDA and then add our silkscreen layers there! It did not work out. Something about our ground plane was breaking EasyEDA’s import and we did not have the time to debug it. We had to de-scope.
Lesson
Always have a plan to de-scope. A badge project only crosses the finish line if you’re willing to cut features ruthlessly. Dropping colour silkscreen was a hard but correct call, made together with Alex.
Here was our final layout:
DVT layout
-
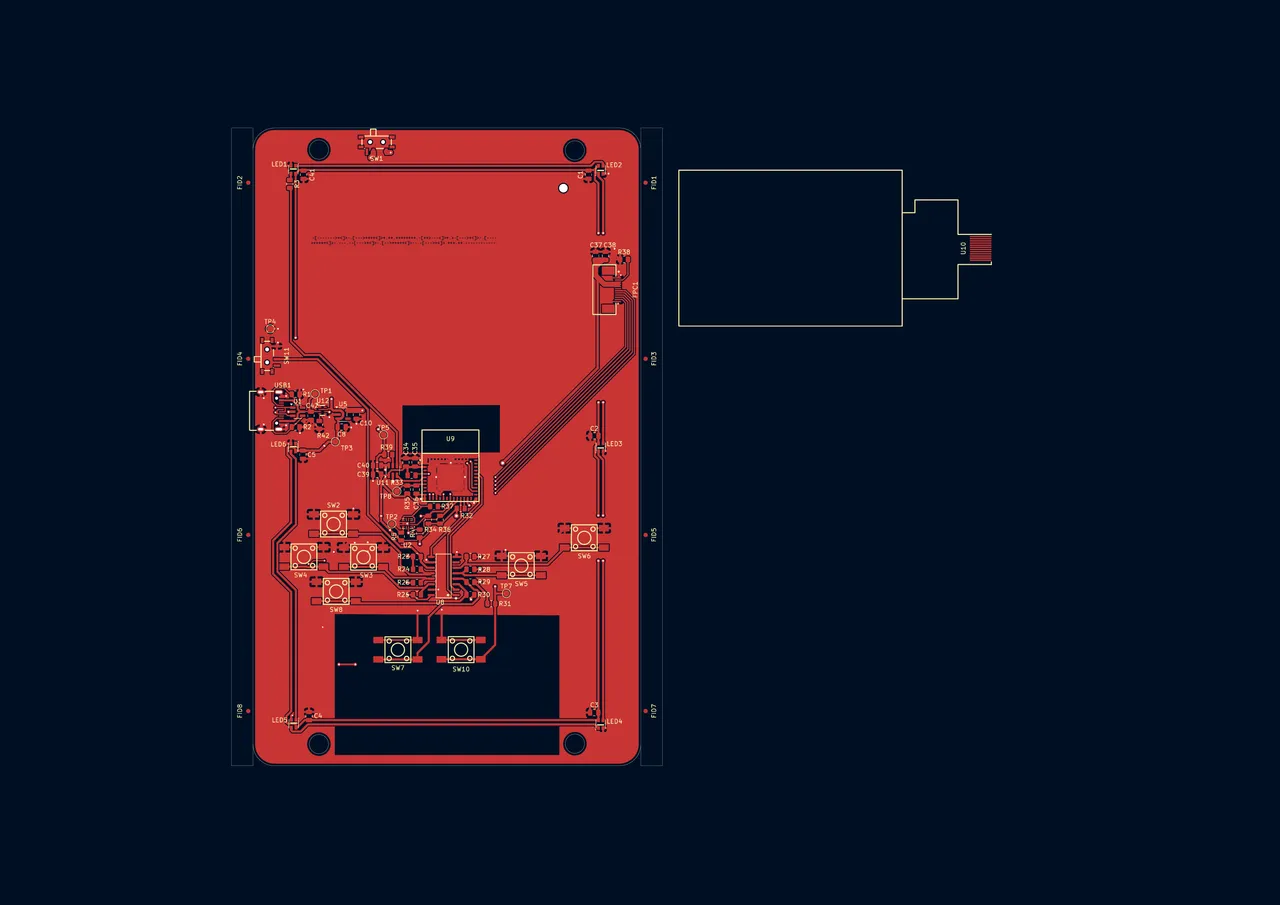
DVT front — the hexagon squared off into a rectangle -
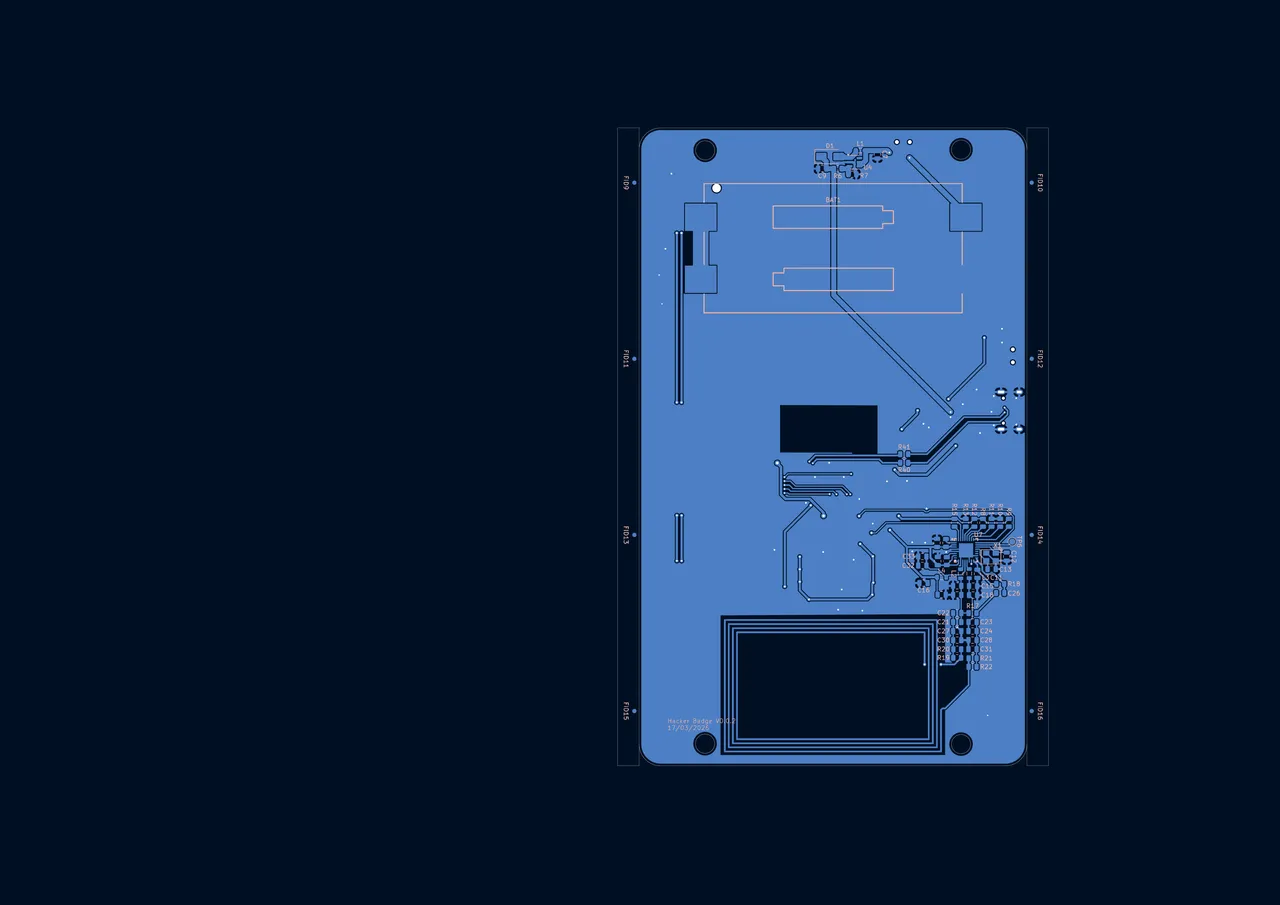
DVT back — bottom layer, still no silkscreen art
Waiting
One of my favourite parts of ordering assembled boards is that JLCPCB X-rays a sample to check the solder joints you can’t see, like the ones hidden under the ESP32 module. Seeing the guts of your own board never gets old:
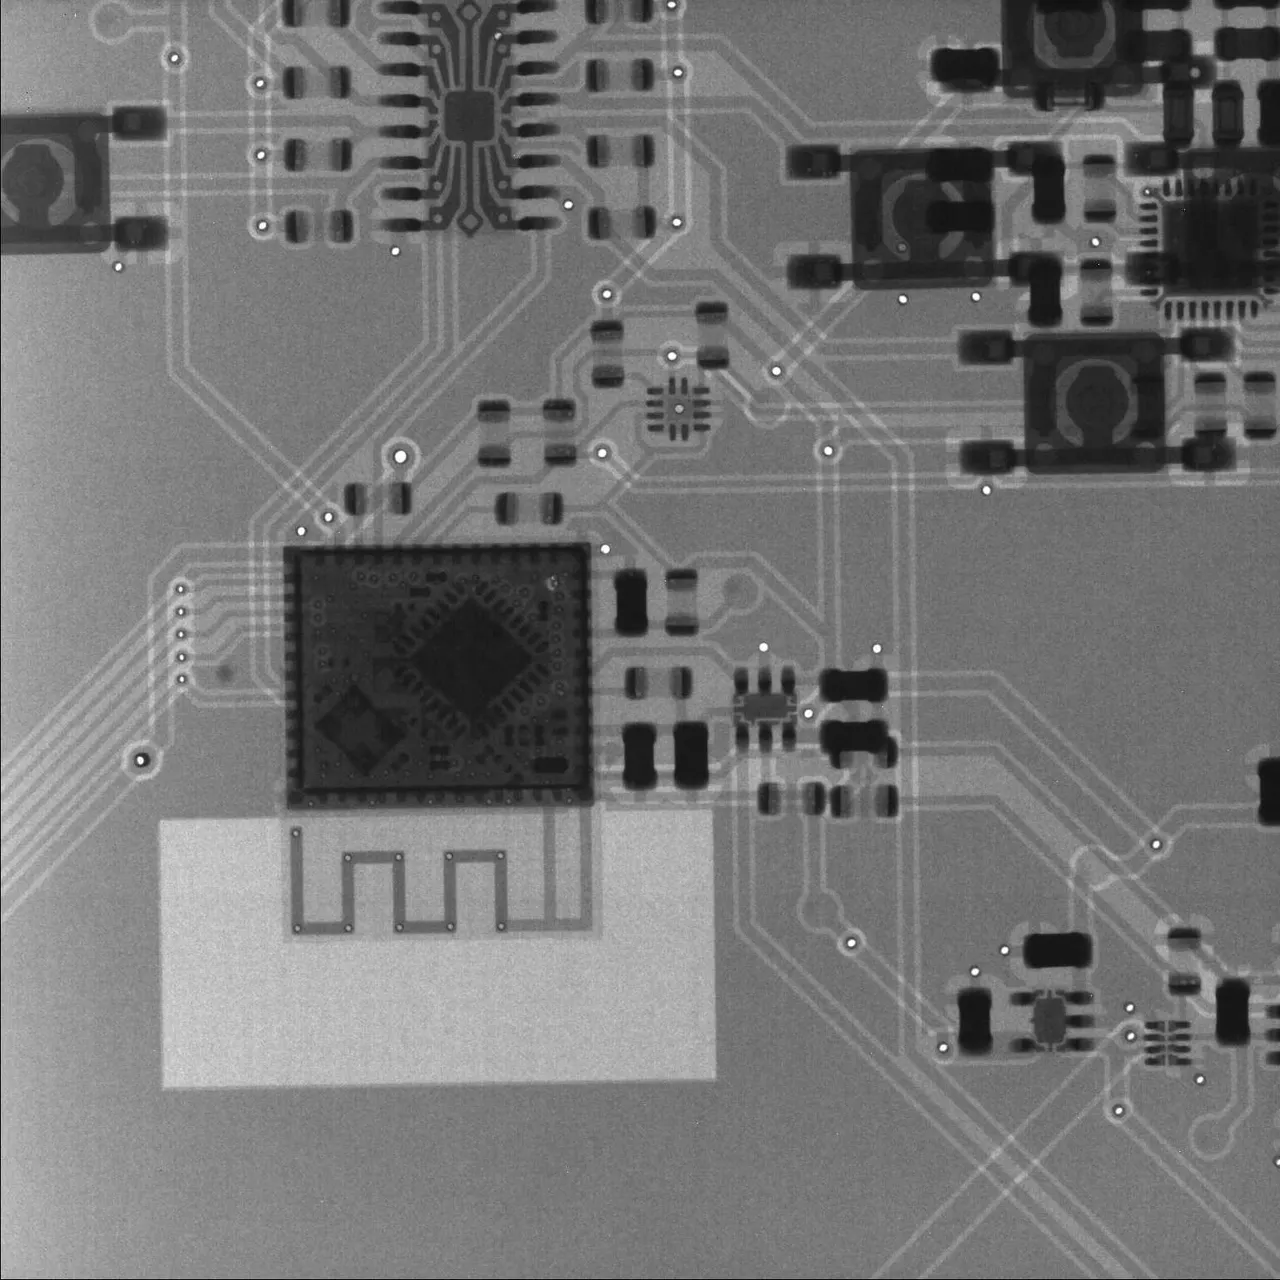
Once the boards shipped, I had Flightradar24 open all day at work, watching the plane carrying our badges cross the Pacific. (We were in SF.)
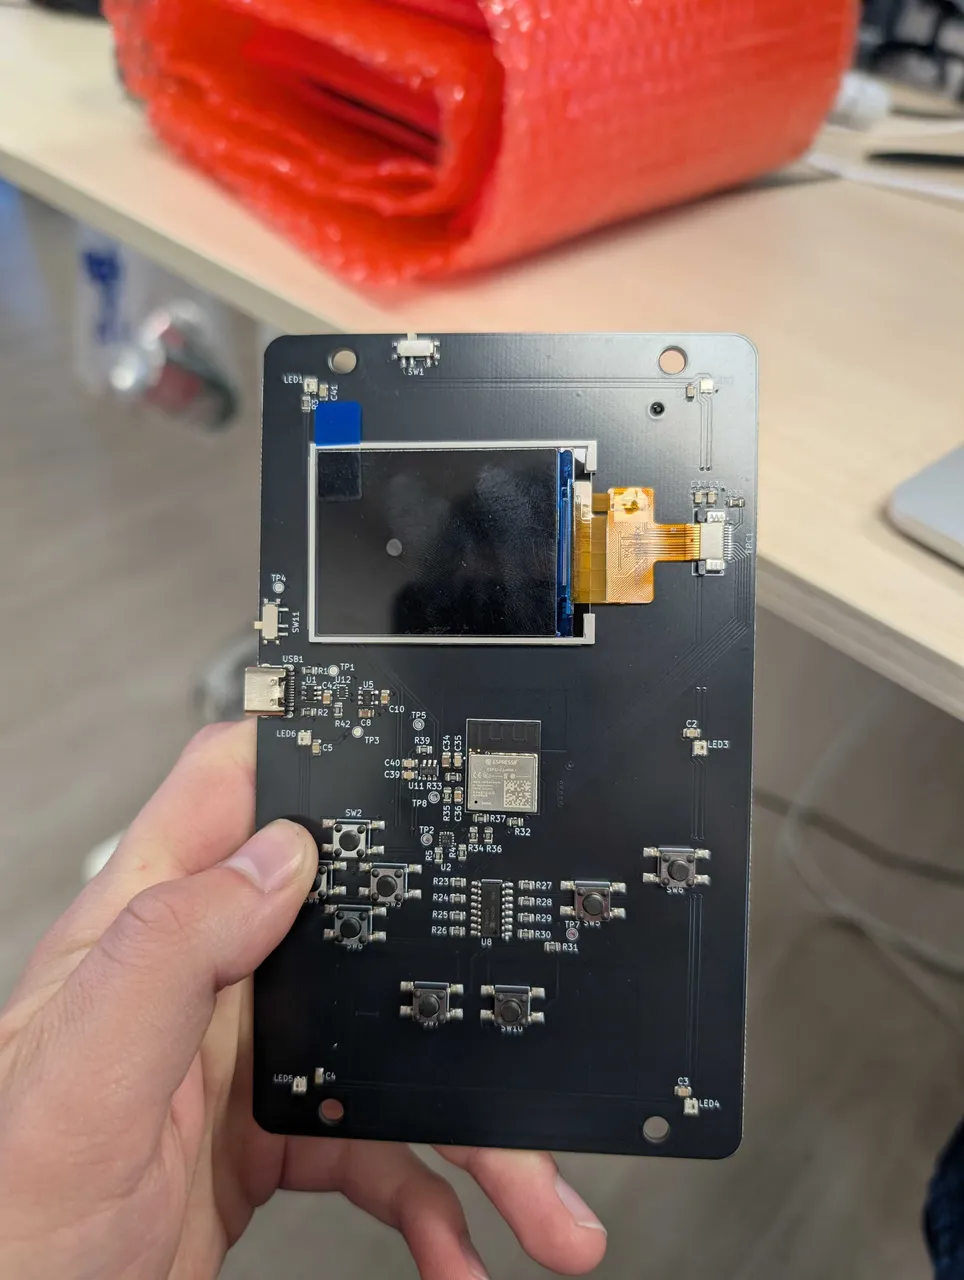
Bring up
I had them shipped to my office and stayed up most of the night playing with them. With AI, I had a basic OS and a set of test apps running within about an hour. By the next day there were 22 of them. Every feature worked. It was, as far as a DVT goes, close to perfect!
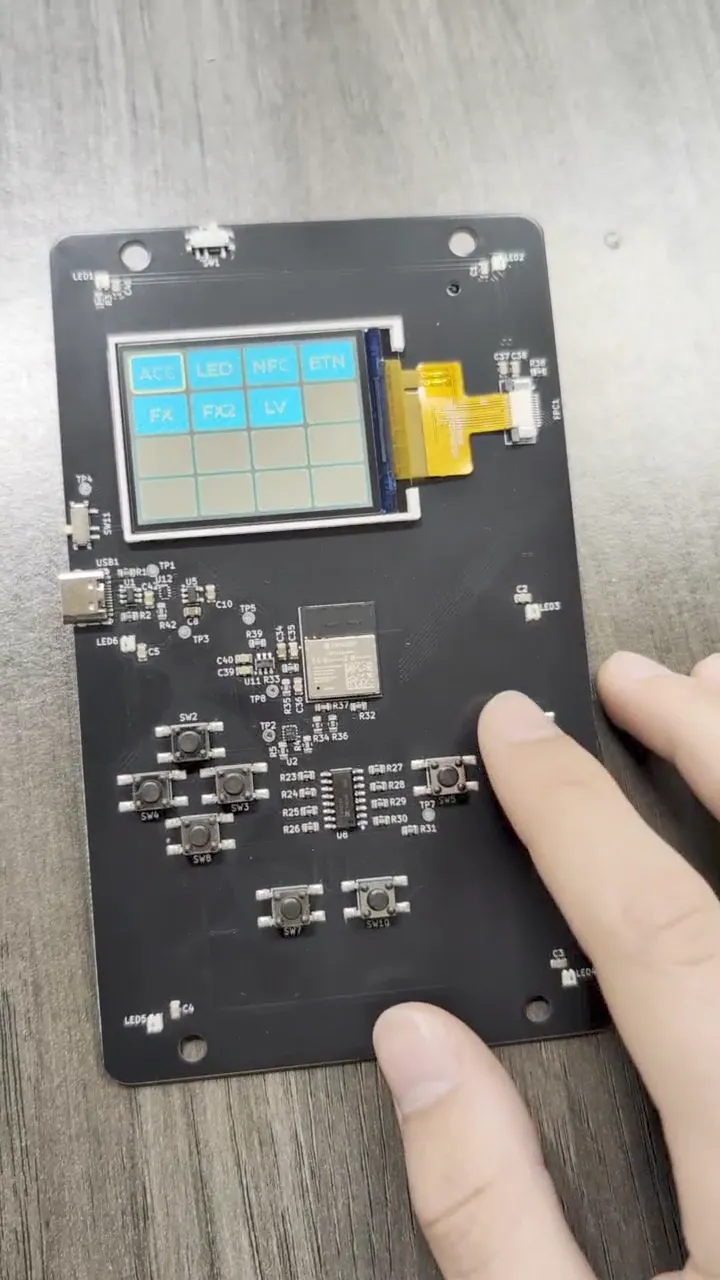
The colours were all wrong, because I’d sent each pixel’s two bytes in the wrong order. We didn’t catch it for weeks, and happily built apps on wonky colours, assuming the cheap screens just looked like that. facepalm
As we started working on the next hardware cycle, the firmware side came to fruition. We very quickly realized the possibilities of this project. For example, we built a Lua runtime so hackers could write their own apps, a browser-based code editor to write them in, and a shell on the badge itself for poking at its files and settings.
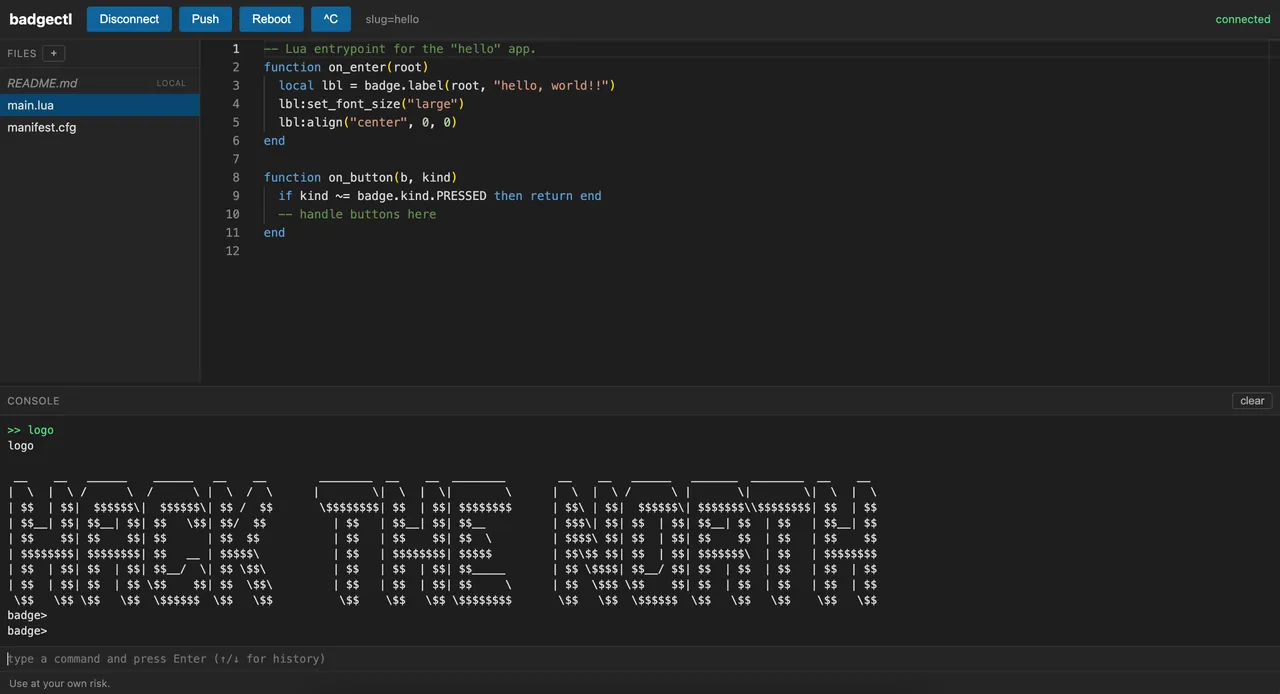
This was the moment the badge stopped being a fancy name tag and became a platform for hackers.
Production Validation Test (PVT)
Riding the high of a working DVT, we felt ready to tackle our full-scale production test. The PVT’s job was to prove we could actually produce this thing without needing to rework anything.
Making a handful of badges was one thing, but doing it at scale turned out to be a whole other beast.
We ordered 50 on May 14. New silkscreen applied, a few moved components. Nothing too major. Famous last words.
NorthSec
While our PVT was being assembled, I headed to NorthSec, Canada’s premier security conference. Think a Canadian DEF CON. They’ve been running hardware badges for 13 years, and I was there for their CTF with my awesome team. Their badge was fantastic: dazzling reverse-mounted LEDs, SAO headers, buttons, a PCIe connector, the works. It was designed with a screen in mind too, but as I understand it, a supplier fell through and the screens never made it.
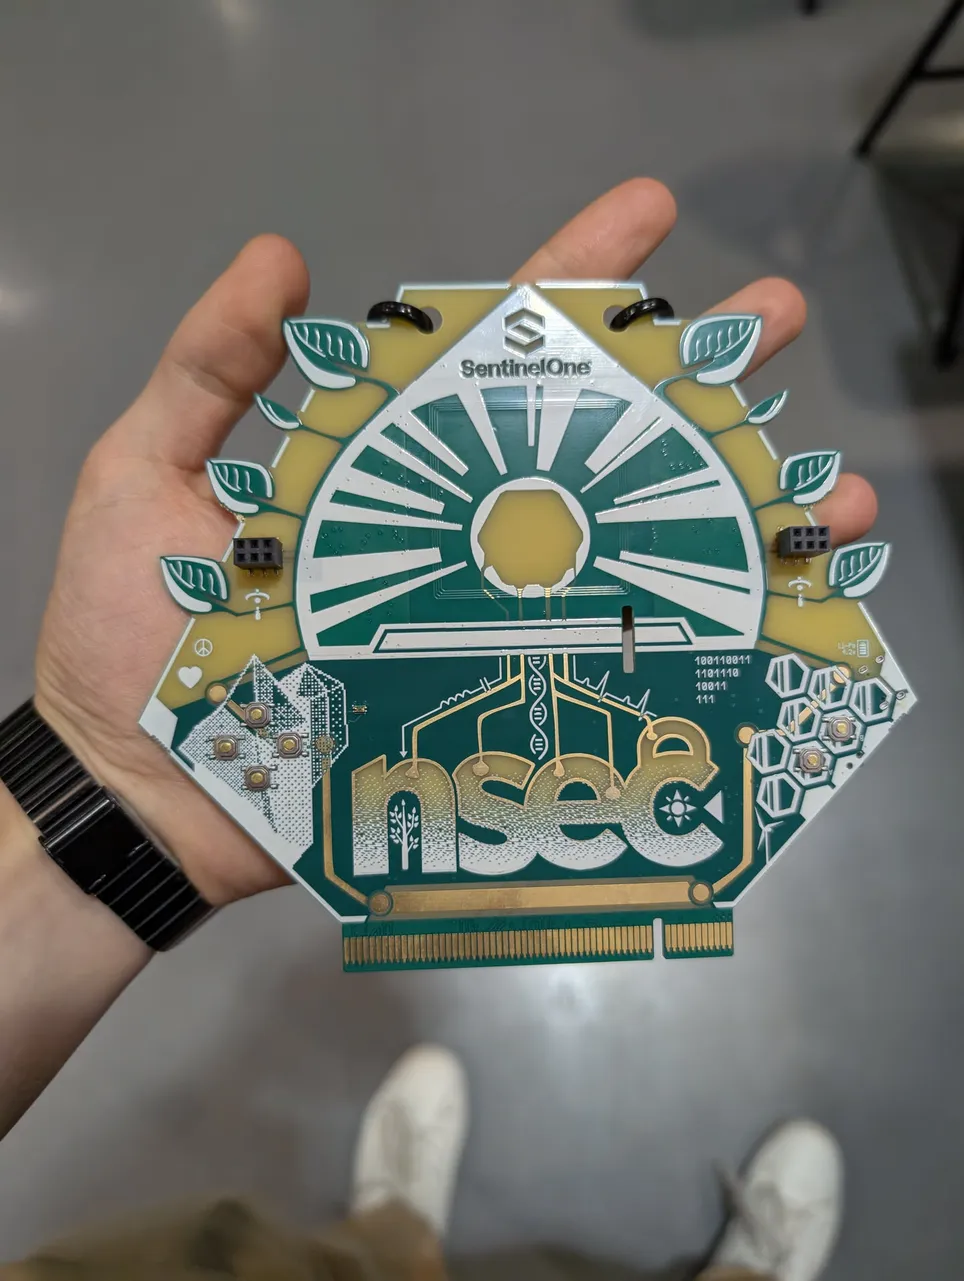
Their badge was almost a mirror of ours. Nearly the same components, the same fab, and around 1,500 badges. In their closing ceremony, they walked through every challenge they’d faced, and they could have practically been reading our Slack. They ordered in March for a mid-May event, spent 20 hours on the phone with DHL, got the badges the night before, and flashed them all night.
By now I was getting quite stressed.
Lesson
Learn from your peers. There’s an incredible community of badge developers out there, and they’re happy to share what went wrong. badge.life
Here was our final layout and schematic:
PVT layout
-
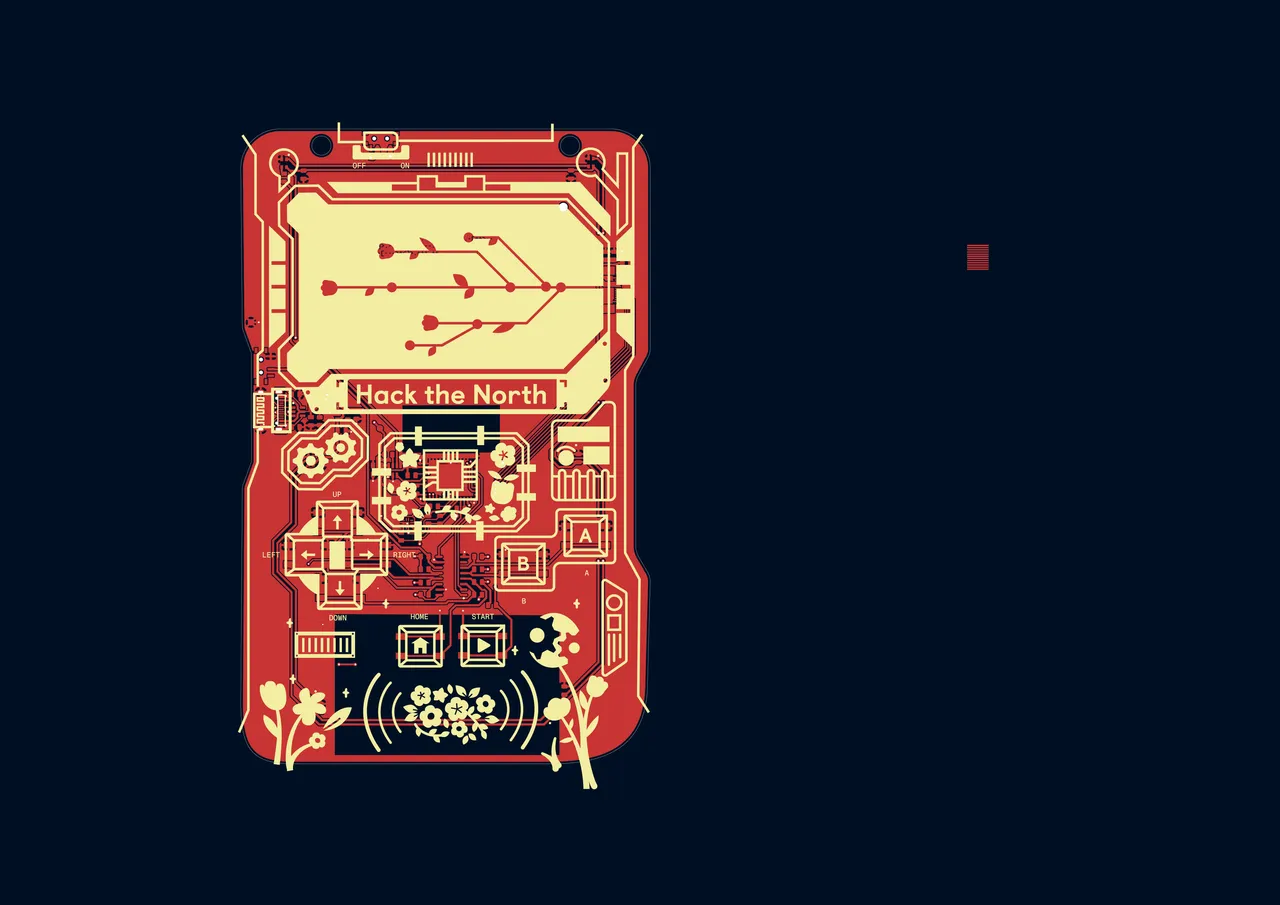
PVT front — the silhouette and silkscreen art land -
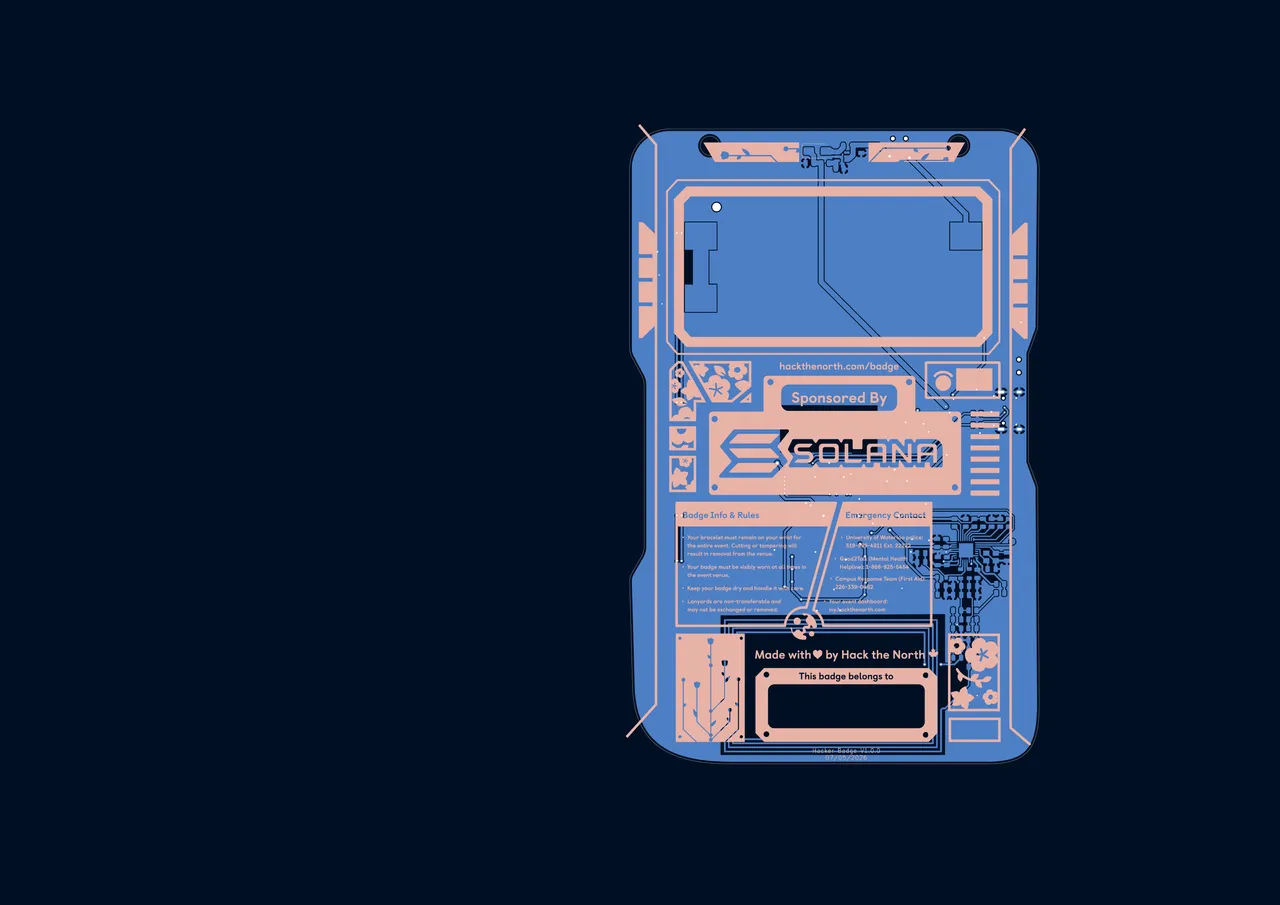
PVT back — sponsor panel, badge rules, emergency contacts
The PVT arrives
Allow me to set the scene: I was in SF, while most of the team was in Waterloo. We decided to send our PVT run straight to Waterloo in the hopes everything would just work, and we could pass badges around the team to start testing. Then we’d simply click “re-order” with a bigger number.
Wiiishful thinking.
Secret feature: smoke!
Our badges worked great with the batteries in the right way. But of course, we can’t expect every user to put them in the right way. Turns out, if you put them in the wrong way, the badge turns into a smoke machine!
Lesson
When building hardware, you can’t trust any form of user interaction, especially if it’s safety critical. This should have been obvious, but I think my subconscious filed it as “out of scope” and almost didn’t want to think about it.
The flipped ICs
Smoke was the flashy problem. The bigger one was that our badges just didn’t turn on. Two chips had been placed rotated the wrong way: the NFC chip and one of the power chips.
How did that happen? During assembly, JLCPCB sent us the final layout with every chip’s orientation and asked us to confirm it all looked OK. What the email didn’t mention was that two of those orientations had changed from what we’d set in the online portal. We gave it a look, nothing jumped out, and we approved it.
Lesson
When a manufacturer asks you to confirm something, treat it like a full code review. Compare it against your own files and look for what changed, not just whether it looks right. Better yet, ask them to call out anything they changed.
On June 5th, Alex and Darien (another organizer) spent the whole day in the Waterloo office with soldering irons while I debugged over a call from SF. Dead boards read 2.2 V on the power rail. End of day tally: three fully working, two working without NFC, and seven still dead.
We later reworked every single board, and all 50 ended up working. But “just click re-order” was dead.
Lesson
Be ready for rework in development. Don’t be afraid of rework.
Picking up the pieces
You just begin. You do the math, you solve one problem. Then you solve the next one, and then the next and if you solve enough problems you get to come home. - Mark Watney
If you haven’t seen or read The Martian, then frankly, stop reading this and go read/watch it.
While our project was not as critical as getting the first ever space pirate home, I’d like to think any problem, software or hardware, can be fixed by solving enough small problems. So we did the math.
De-smokifier
We added a FET to our battery line in case people put the batteries in the wrong way. Wired for reverse-polarity protection, it only lets current through when the batteries are the right way round. Batteries in backwards now just means the badge doesn’t turn on.
The problem was realizing this so late. We didn’t have time for another PVT to test the change, so it was going straight into production. To be safe, I reworked a FET I had lying around onto a PVT board to make sure it passed some form of smoke check. We also hedged our bets with a bypass jumper in case the fix broke something else.
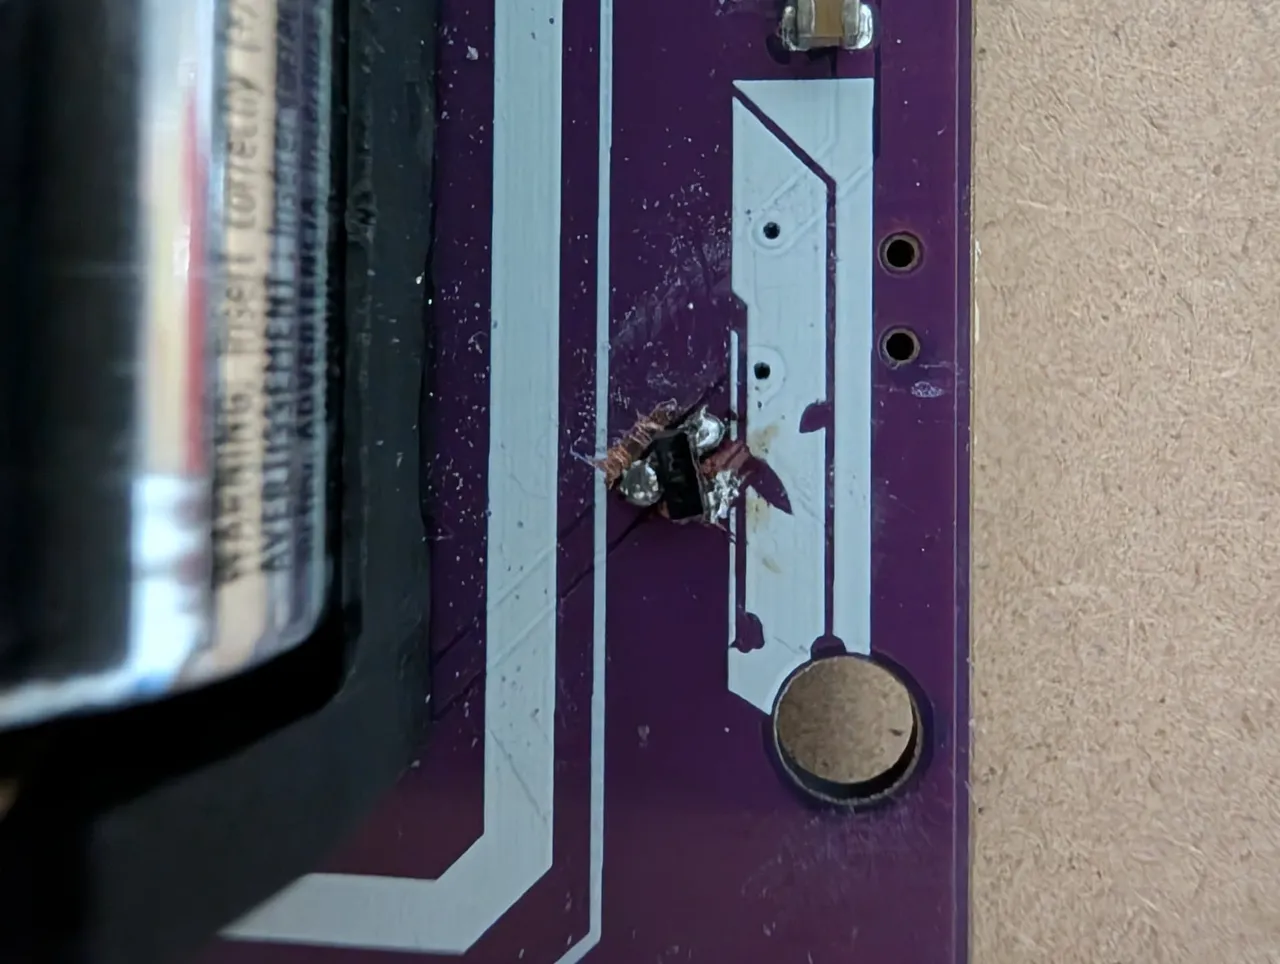
(Yes, my rework abilities could use some work. In fairness to me, I was soldering to a ground fill.)
It worked! Power profiling showed almost no efficiency loss either. We also added battery safety instructions to the back silkscreen for good measure.
Orientation dots
Most PCB silkscreens include small dots showing which way each chip goes. We didn’t include those for aesthetic reasons. We reversed that decision and added the dots. They’re barely noticeable, and they helped a ton in our final run to double-check orientations.
First article inspection
No more “find out when it arrives.” For production, JLCPCB would assemble a small first batch, send us photos and test results, and wait for our go-ahead before building the rest. If something was wrong, we’d lose a few badges instead of 1,750.
Clarity in emails
A lot of our PVT failures came down to communication. So I wrote JLCPCB a long email titled “Issues to Resolve Before Our 2,000+ Unit Order.” I attached photos side by side: a correctly assembled screen from our previous order next to what we’d just received. No ambiguity about what “taped down” means.
This question we added turned out to be one of the most useful ones we could have asked:
“What is the best way for us to document this requirement so it works well for your process? A dedicated assembly drawing, a process note on the order, attached reference photos, or referencing the previous order number? We’re happy to provide whatever makes it unambiguous on the production floor.”
Their answer: text-only instructions can be unclear for their operators, so send a PDF with screenshots. Easy! We wrote our test procedure the same way.
Lesson
Ask the factory how to tell the factory things. They know what their operators need.
Supply chain
I knew the parts supply chain was going to be a problem. I knew this in February. I made every possible effort to not have it be an issue. It became an issue.
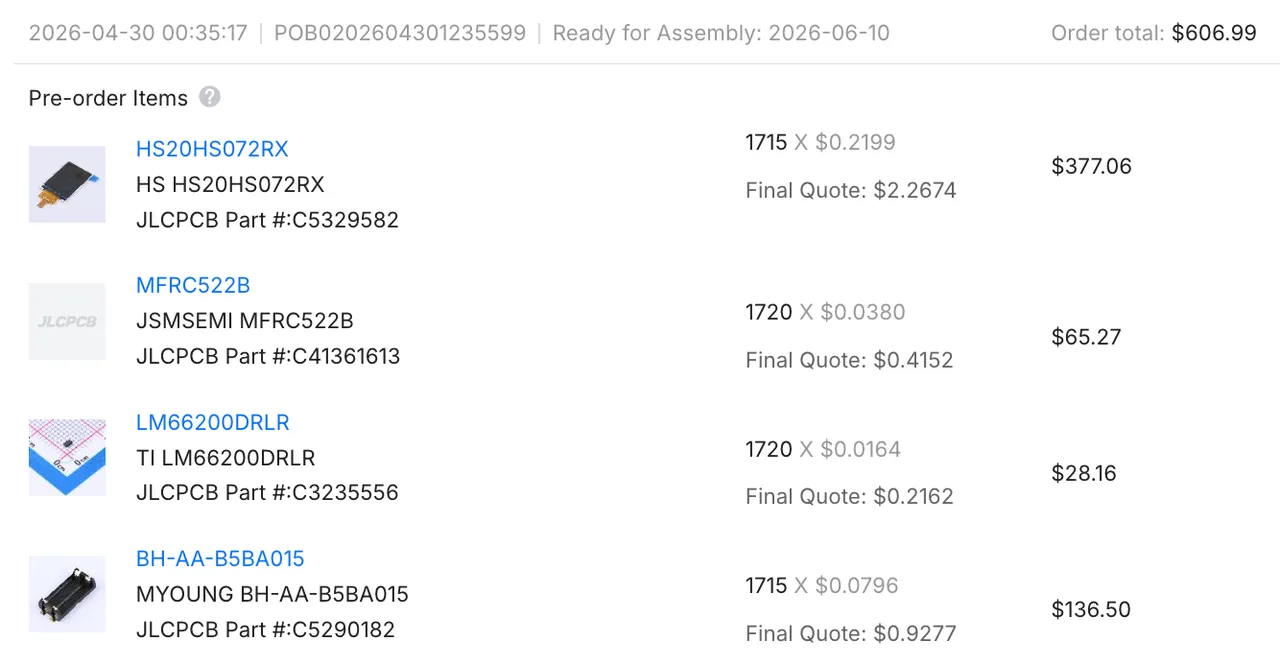
This was our first pre-order. We only pre-ordered parts that didn’t have enough resting stock on JLCPCB for our order. This turned out to be a mistake. Resting stock fluctuates fast, and it can be rug pulled out from under you.
Even when you pre-order, lead times can be long. We placed this pre-order on April 30, and the screens came June 10. Maybe that’s short for HBM chips, but for a hackathon, that’s a long time!
Case in point: when we were designing the board, the WS2812B-2020 LED had plenty of resting stock. No reason to pre-order, right? Right as we were about to order, the LEDs were rug-pulled from under us. The stock count flipped between 22,000 and 3,000 every time I refreshed the page. Our first pre-order got cancelled over our order quantity not being a round number. The second quote was cheaper, but 29 business days out. Useless. The third came back at 8 business days, and we grabbed it. Our production order slipped while we waited.
Lesson
Lock in supply early. Pre-order all but the most common passives as soon as your design is locked down, if your finance team can support it. Especially the critical parts: power, screen, and micro.
Production Run
On June 30, we hit order: 1,750 populated badges for hackers, plus 750 blank boards for volunteers. The blanks showed up a week later. The populated ones were going to take a while.
All the marbles
Remember the “does this look OK?” email that got us during the PVT? Before production, JLCPCB sent us their placement render to confirm, just like last time. This time, I checked every single rotation against our own files. Good thing I did: the brand-new FET, the one we’d added to stop the smoke, was rotated the wrong way.
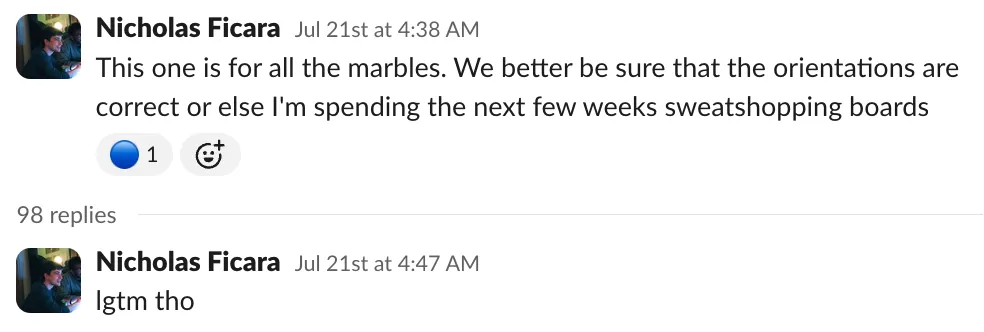
This run was indeed for all the marbles.
Here was our final design with the added FET change included:
Production layout
-
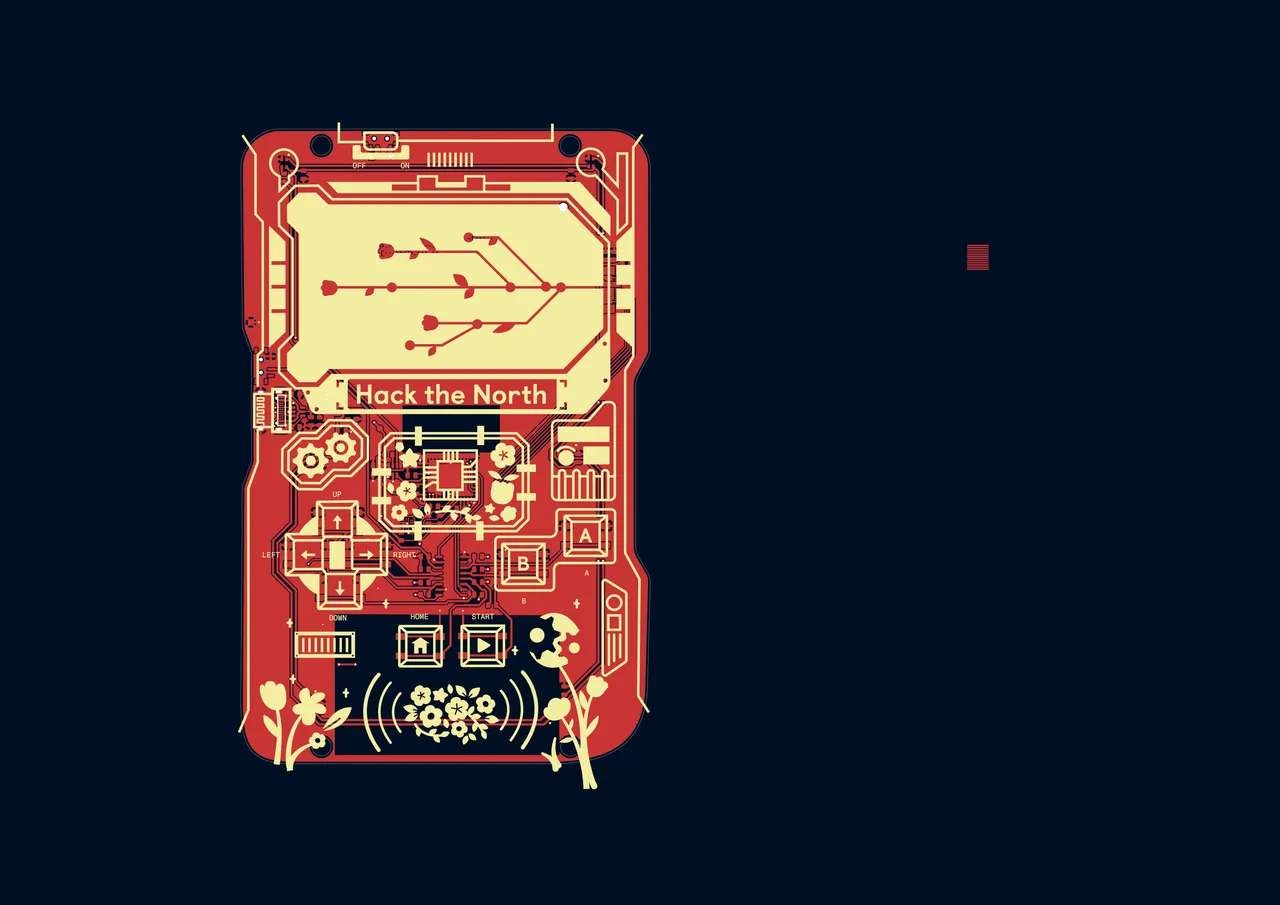
Production front — the art that shipped on 2,500 boards -
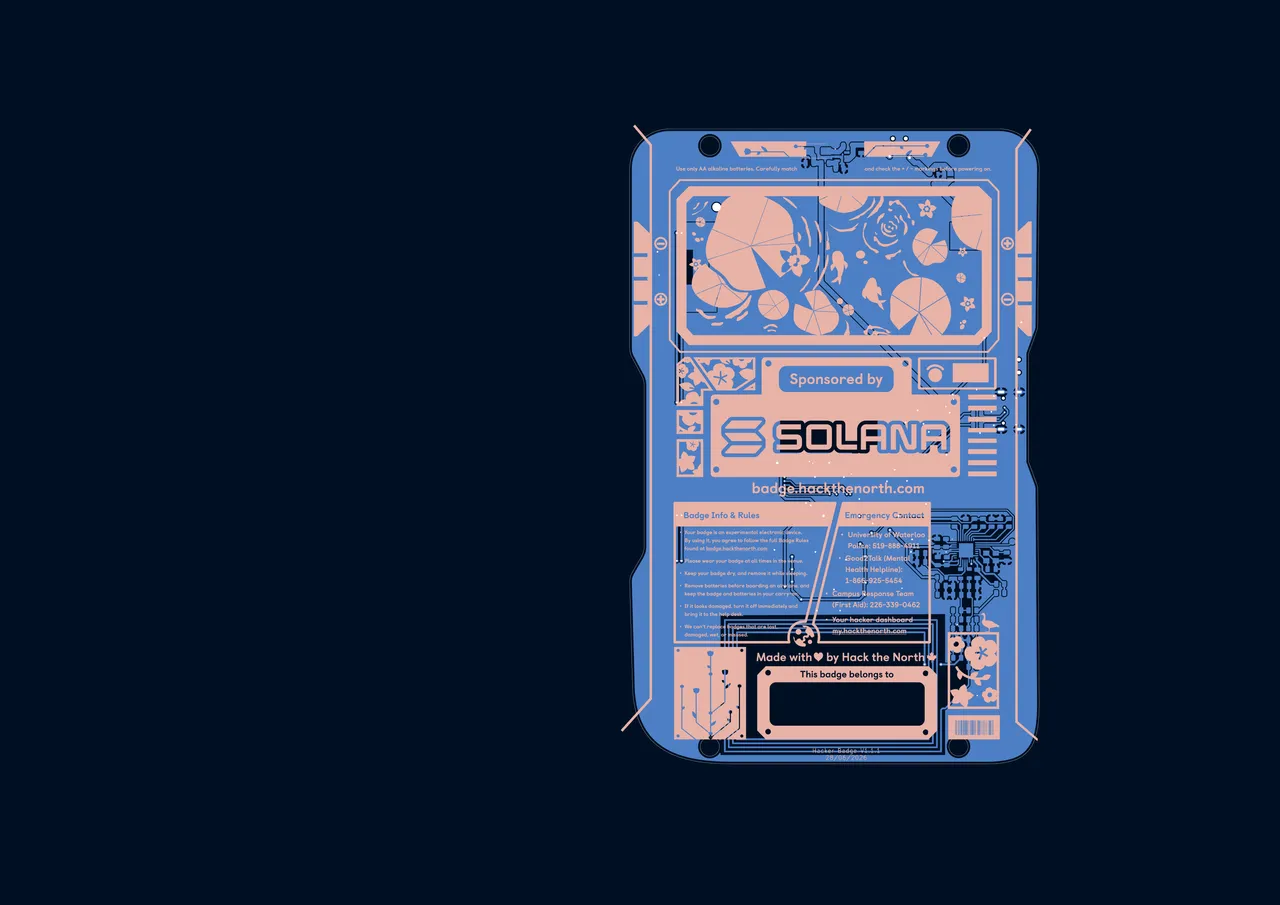
Production back — the final sponsor and info panel
Gigapixel photos
A week later, JLCPCB sent us gigapixel photos of our badges in production!
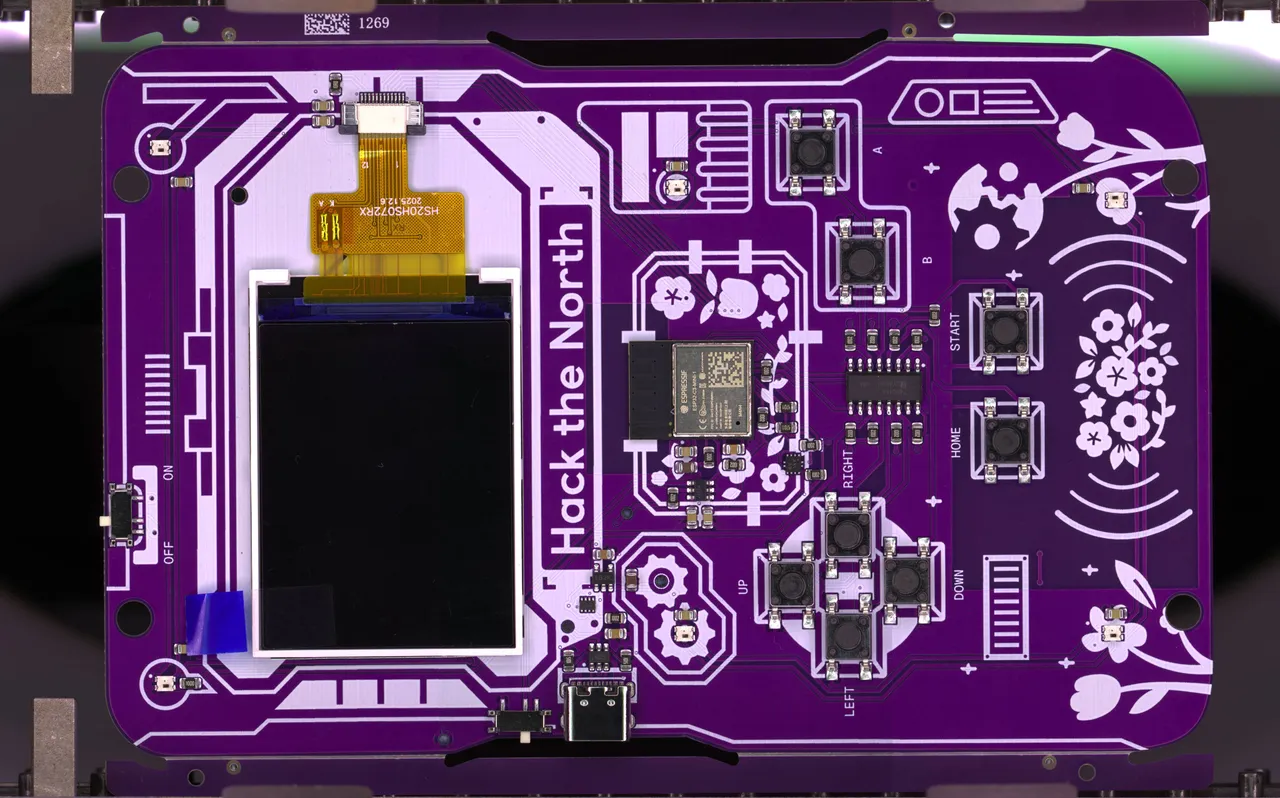
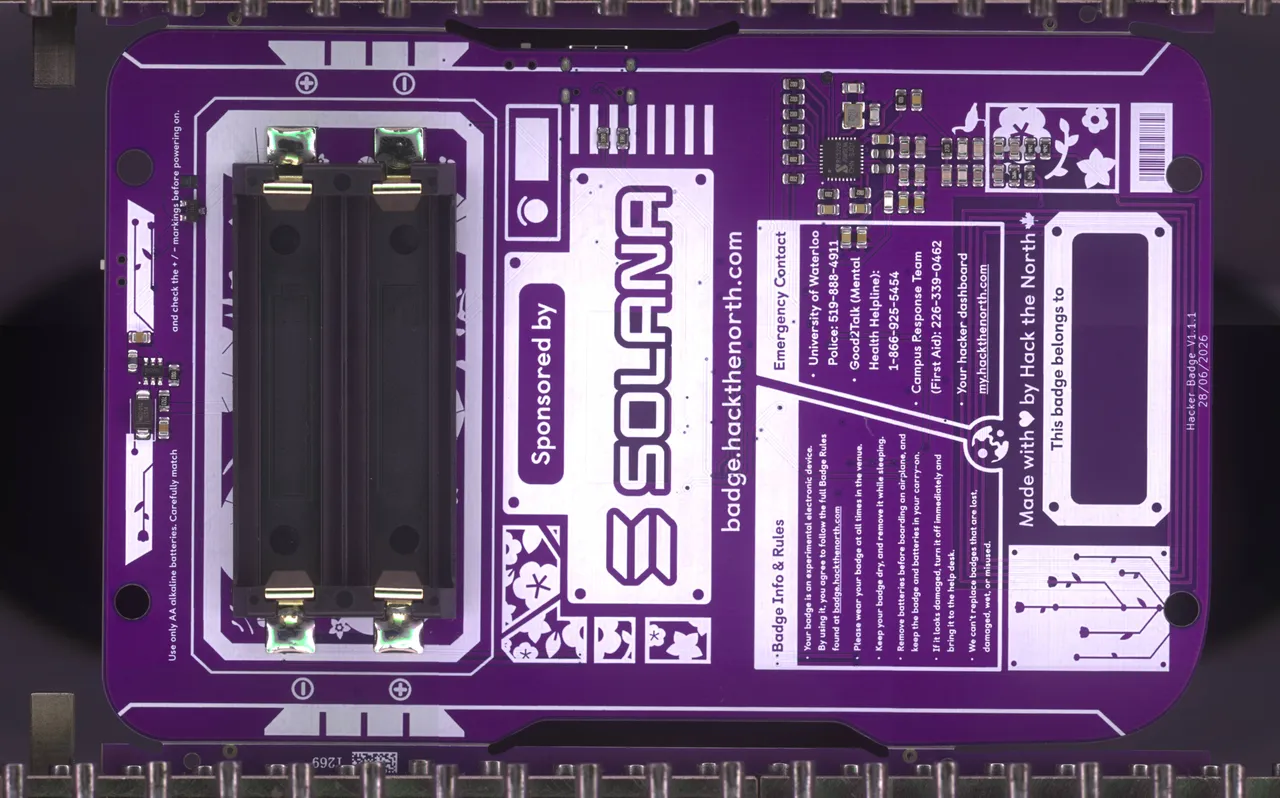
(I don’t think I can include the raw ones here, as they are massive.)
The first article that wasn’t
Then I noticed the order status: “Packaging.”
After the PVT, we’d set up a first article inspection. JLCPCB would build a small first batch, test it, send us the results, and wait for our go-ahead before building the rest. Alex had been worried about exactly this: having them assemble everything, test a few, and then tell us something’s wrong. “Packaging” meant the whole run was already built.
“Did they just completely ignore the testing procedure?” I asked in Slack.
We emailed right away asking them not to ship until they’d confirmed the testing status. The next day, they sent a video of operators running our test firmware on the line, and the boards were passing. Phew. But the step meant to stop a repeat of the PVT never happened. If something had been wrong, we would have found out with 1,750 boards built instead of a couple dozen.
Lesson
Asking for a process step doesn’t mean it happens. Get confirmation at each checkpoint before the next step starts, not after.
The toothbrush
Testing turned up a few casualties. One NFC chip failed and got swapped for a spare from our own stock. One board had a missing pad that couldn’t be repaired. (We took it anyway.)
Then came the cleaning question. Assembly leaves flux residue on the boards, and over 1,000 of ours were finished but not yet cleaned. JLCPCB’s cleaning method? A toothbrush wrapped in a cleanroom wipe, by hand, one board at a time. With a warning that the cleaning solution was corrosive and might discolour some components.
We paid the $59.11. These were going around 1,750 necks, and we wanted them clean.
Speed over perfection
On August 10, 25 screens failed testing: a bad batch from the supplier. That left 1,676 boards ready and 24 stuck waiting on replacement screens.
The math was simple. Hack the North was September 4, and that date wasn’t moving. Shipping took about a week, so the boards had to leave by August 20 at the latest, and I wanted them out by the 15th. So I wrote what might be the most important email of the whole project:
“Around 1,600 working boards on time is far more valuable to us than 1,750 perfect boards arriving late.”
I gave them approval to skip reworks, set aside problem boards, and ship whatever was ready. I offered to reply at any hour, pay extra fees, switch to WhatsApp, or hop on a call in Chinese. Whatever it took.
Lesson
Tell your manufacturer what matters most. They can’t make trade-offs they don’t know you’d accept.
The same thread brought one last piece of feedback: a few hand-soldered battery holders had weak joints, because the pads were exactly the size of the holder’s metal tabs. Their recommendation was to make the pads at least 0.5 mm bigger on each side so the solder has room to flow. In fairness to me, I’d used JLCPCB’s own footprint for that part.
Lesson
Library footprints aren’t gospel. Check them against the manufacturer’s recommendations, especially for parts that get soldered by hand.
Wheels up
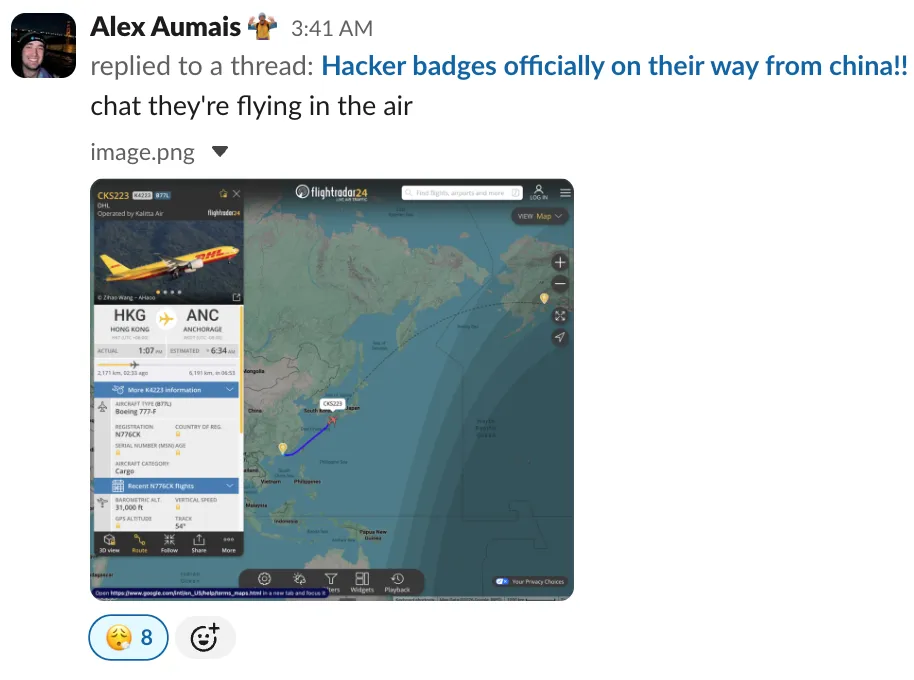
The badges shipped on August 13. And yes, I had Flightradar24 open again, this time watching a DHL 777 freighter carry them from Hong Kong to Anchorage at 31,000 feet.
They arrived on August 20, roughly a month before event.
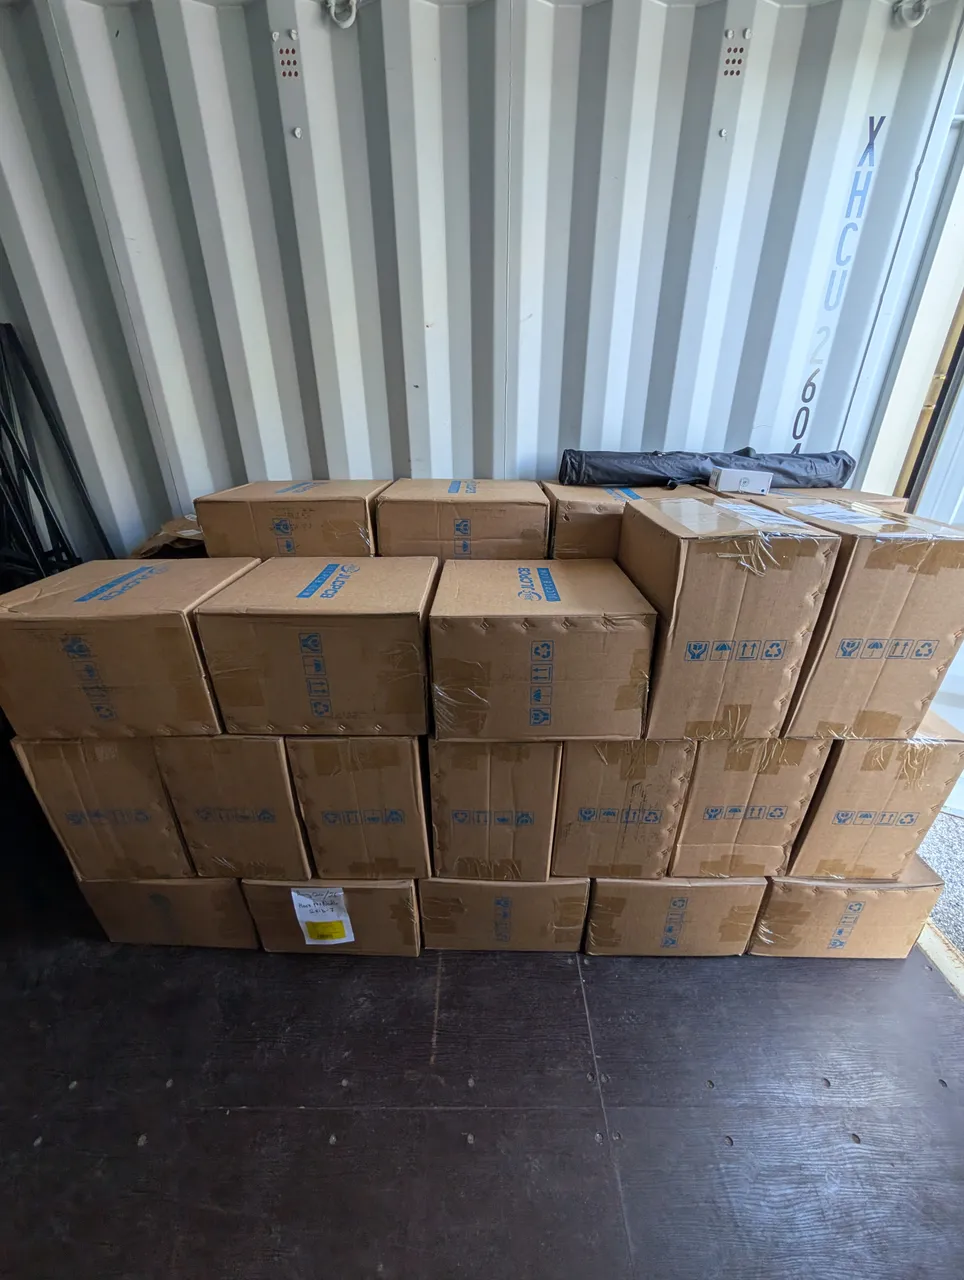
There were 34 boxes, with roughly 50 each.
Preparing the badges
Our process was simple but time consuming:
- Open the box and remove the bubble wrap
- Take the badges out, and stack them with one foam in between each
- Snap the rail (the other side’s rail was snapped by JLC for access to the USB-C port)
- Clean off the sides with steel wool (we switched to using the rails themselves after)
- Flash it (this was so fun we decided to do it twice!)
- Attach the event lanyard
- Re-package
We started at 7pm. We finished at 3am. It takes a truly devoted team to pull this off. Thank you team!
The weekend
The greatest moment during event weekend was seeing hackers take our badges and make them their own.
Hackers were flashing custom apps:
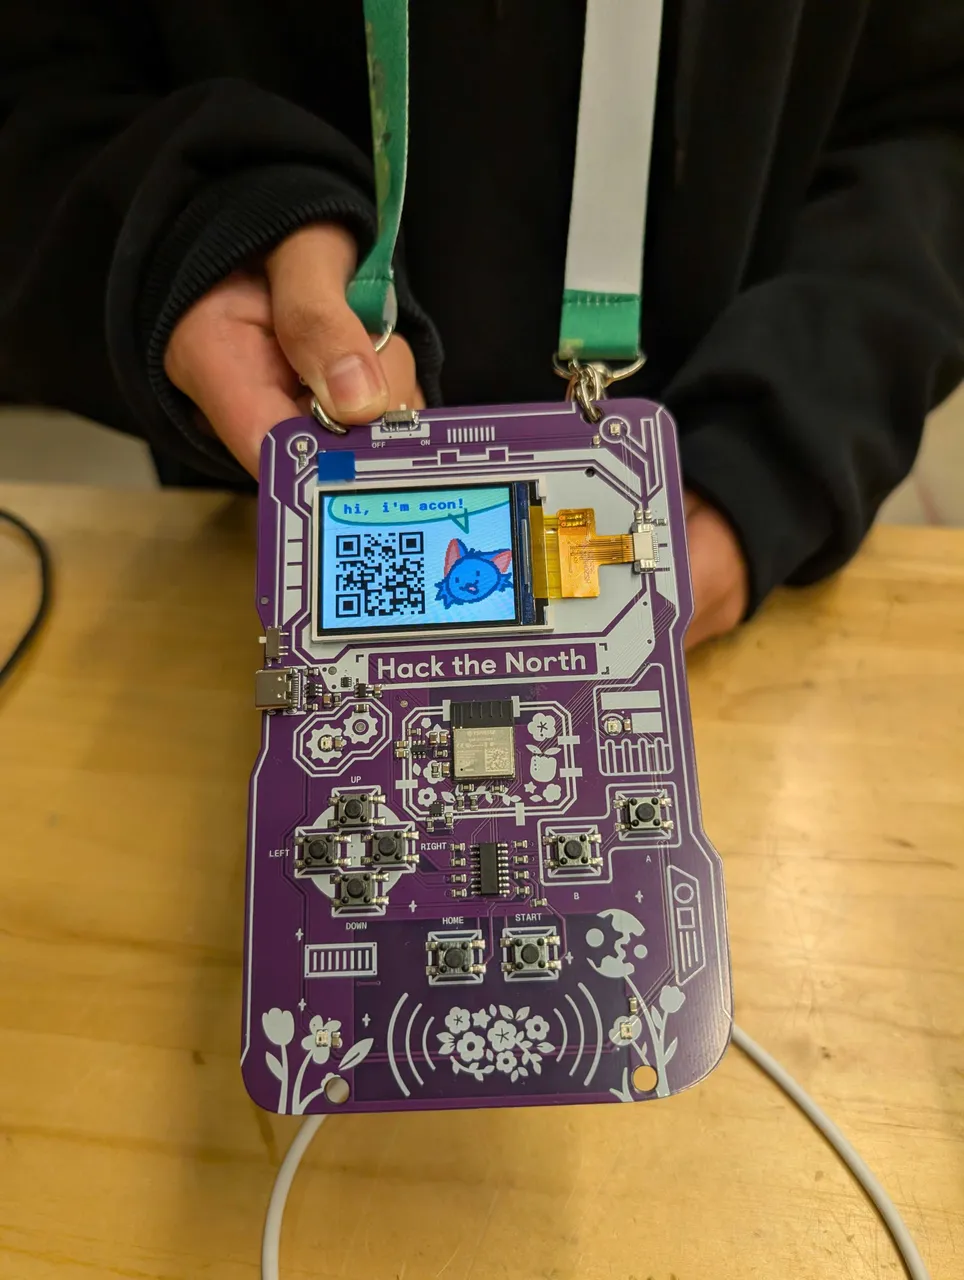
Adding people on social media with the badge bump feature:

And some went extra crazy! We saw one team turn the badges into controllers for Tux Racer!
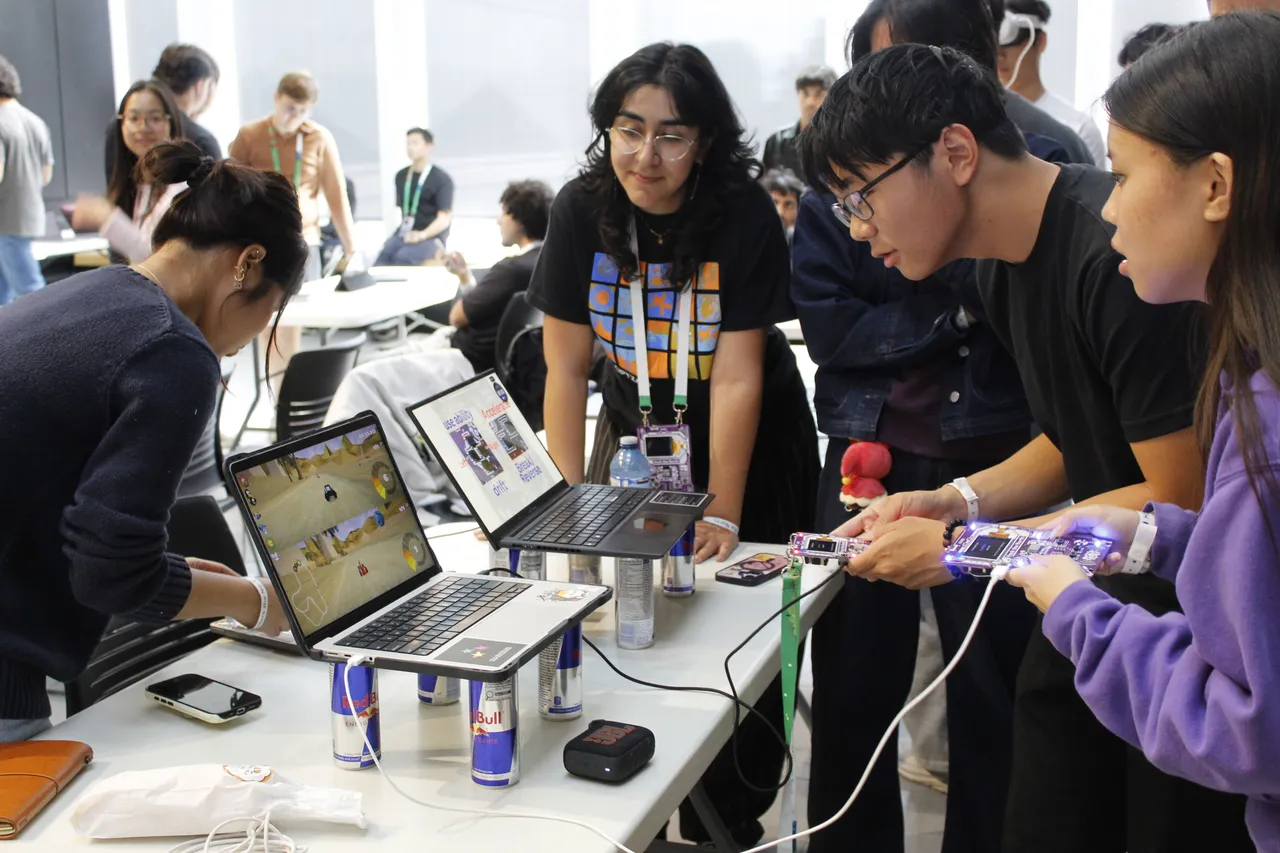
And this team live-demoing a beat sync app on the badges!

Overall, the weekend went phenomenally. The badges worked.
We also ran a workshop to teach hackers how to hack their badges. This went incredibly well. There were so many hackers that came running up afterward holding their badges out showing us the insane things they were doing.
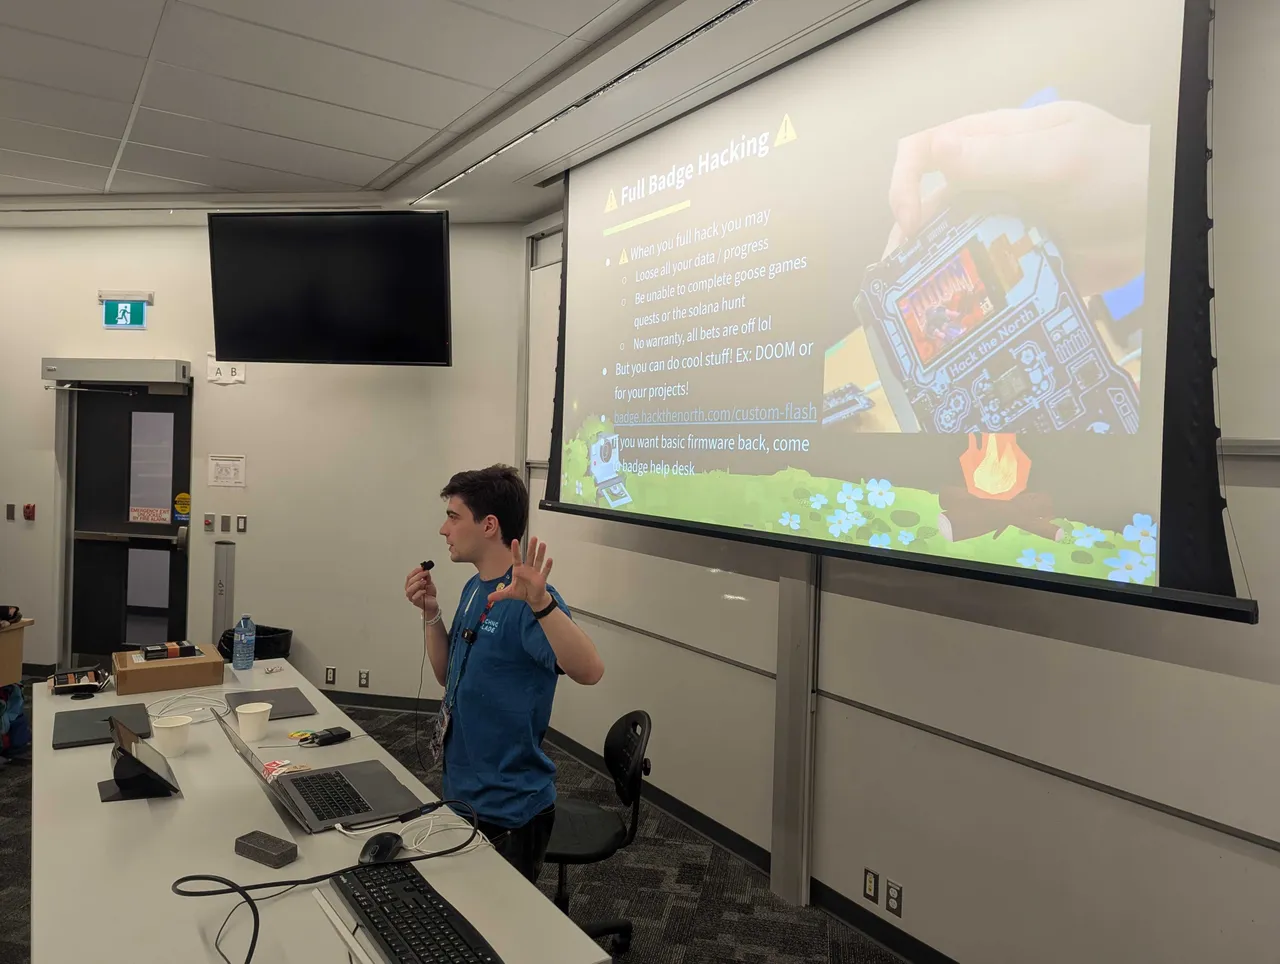
The devpost submissions for badge hacks began flowing in, and they just didn’t stop. Devpost filtered by badge hacks..
Badge hacks
-

bingbong — rhythm game finalist -
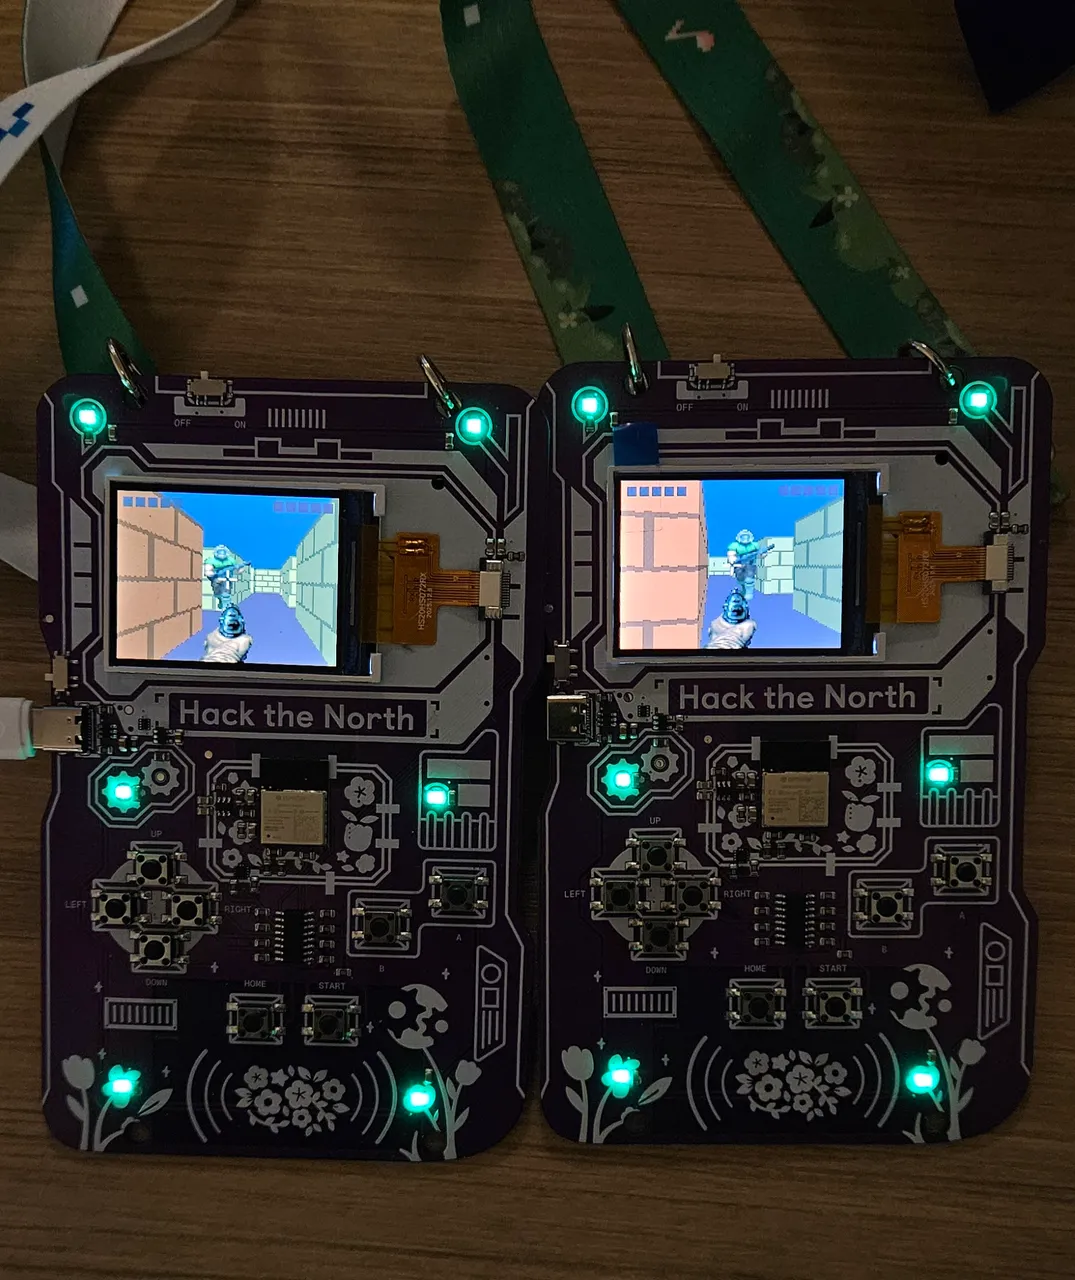
FirmWar — a multiplayer shooter -
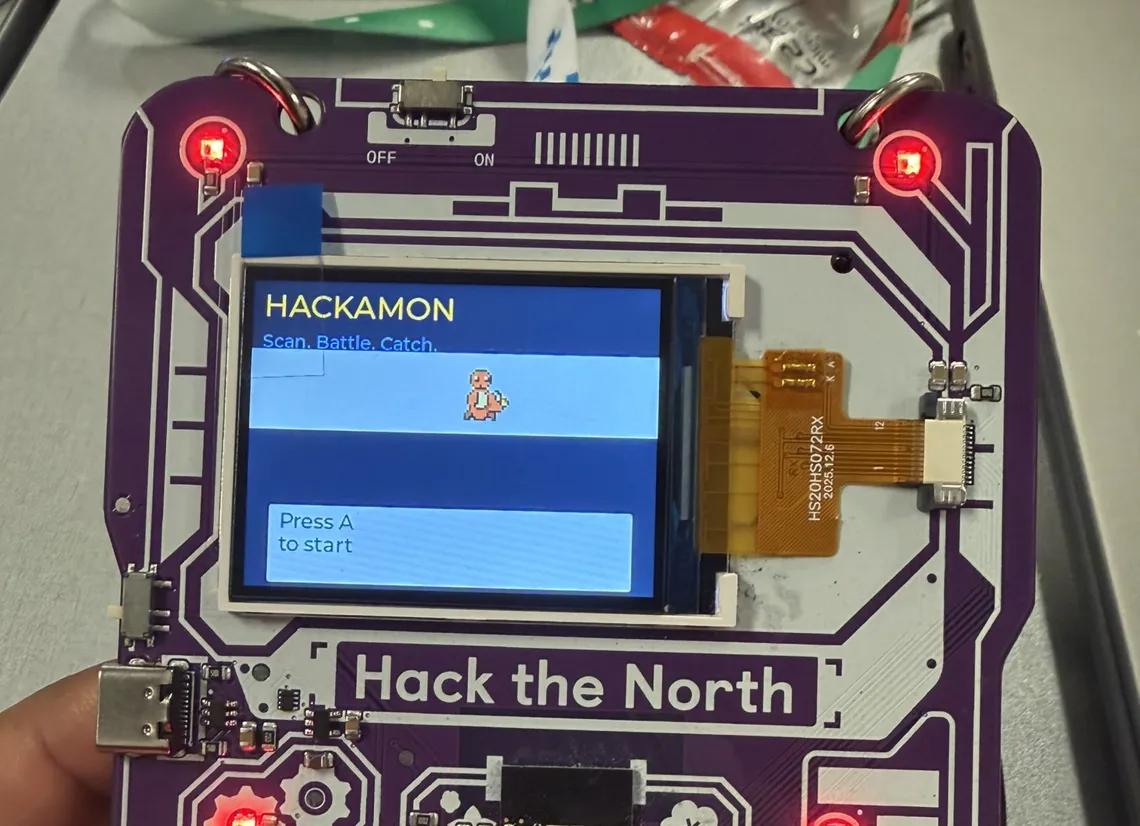
Hackamon — Pokémon GO with NFC -
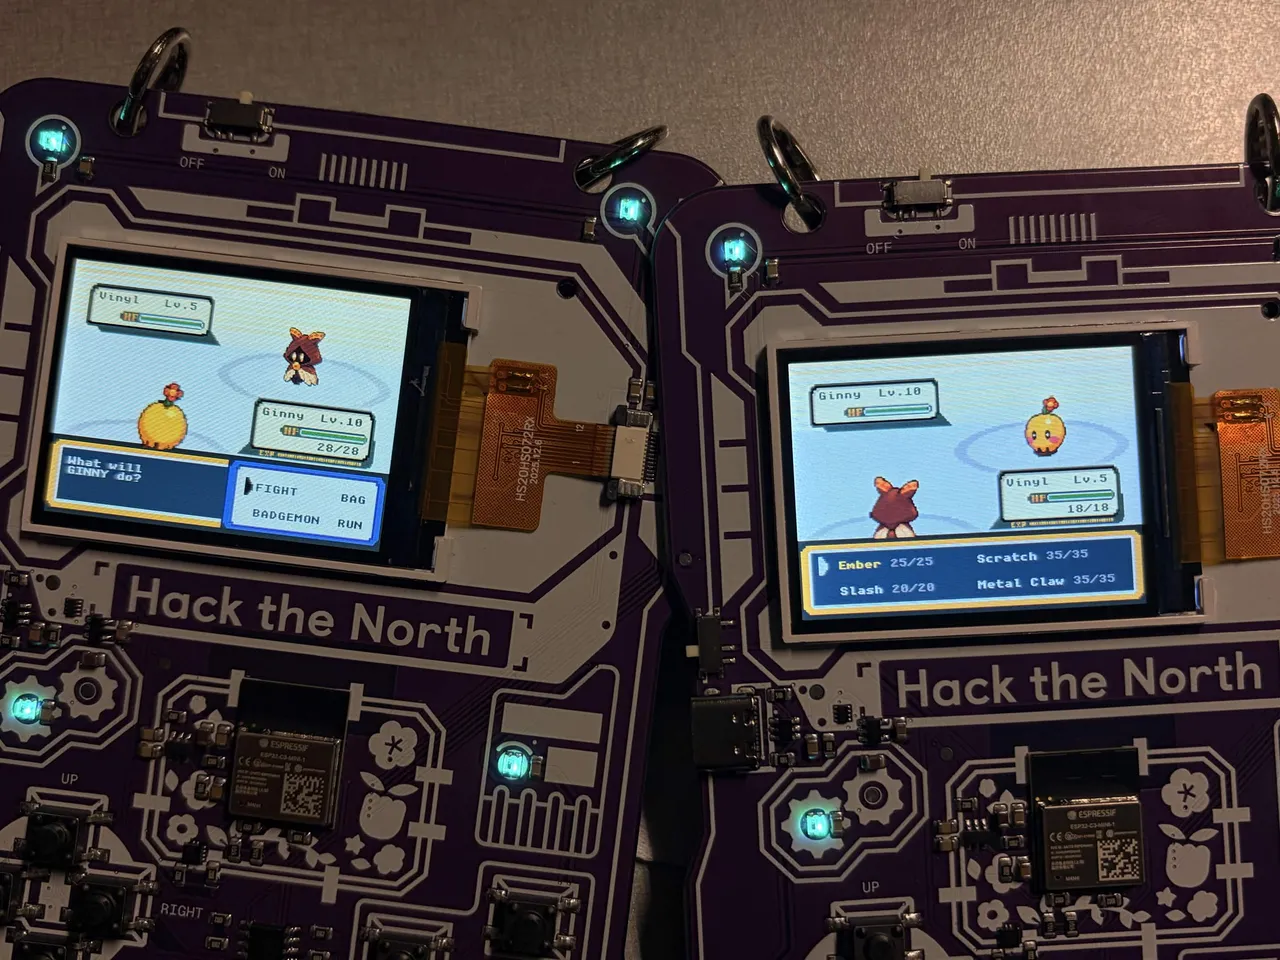
Badgémon — battle whoever's nearby -
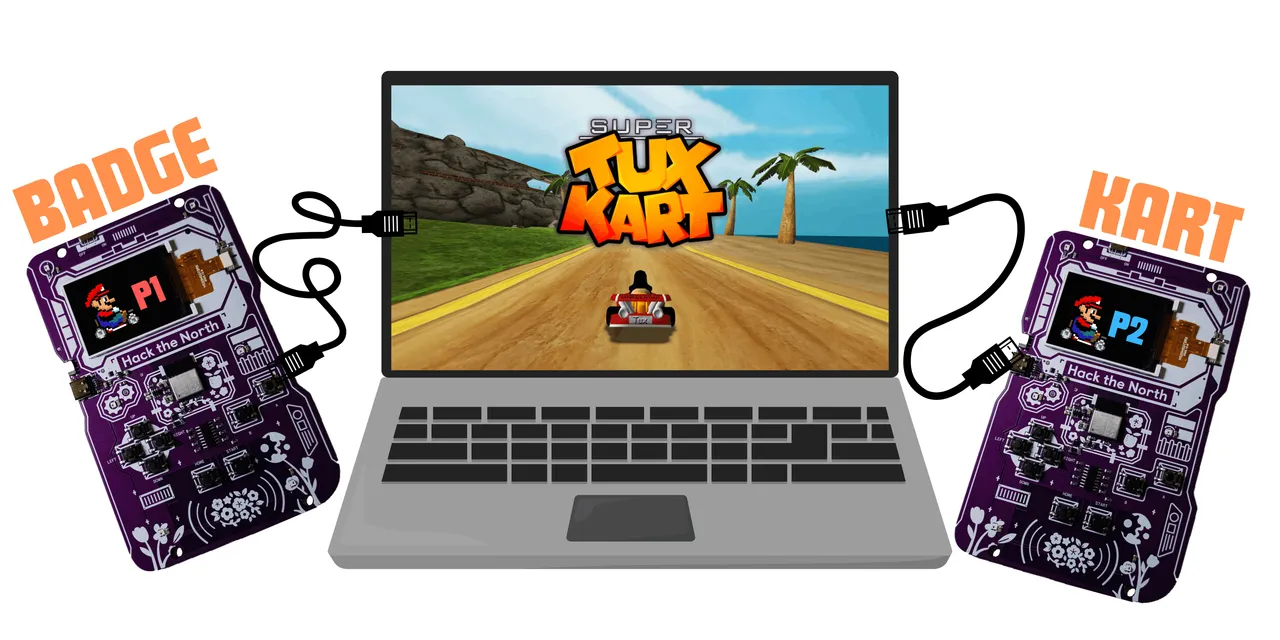
Badge Kart — shake for nitro -
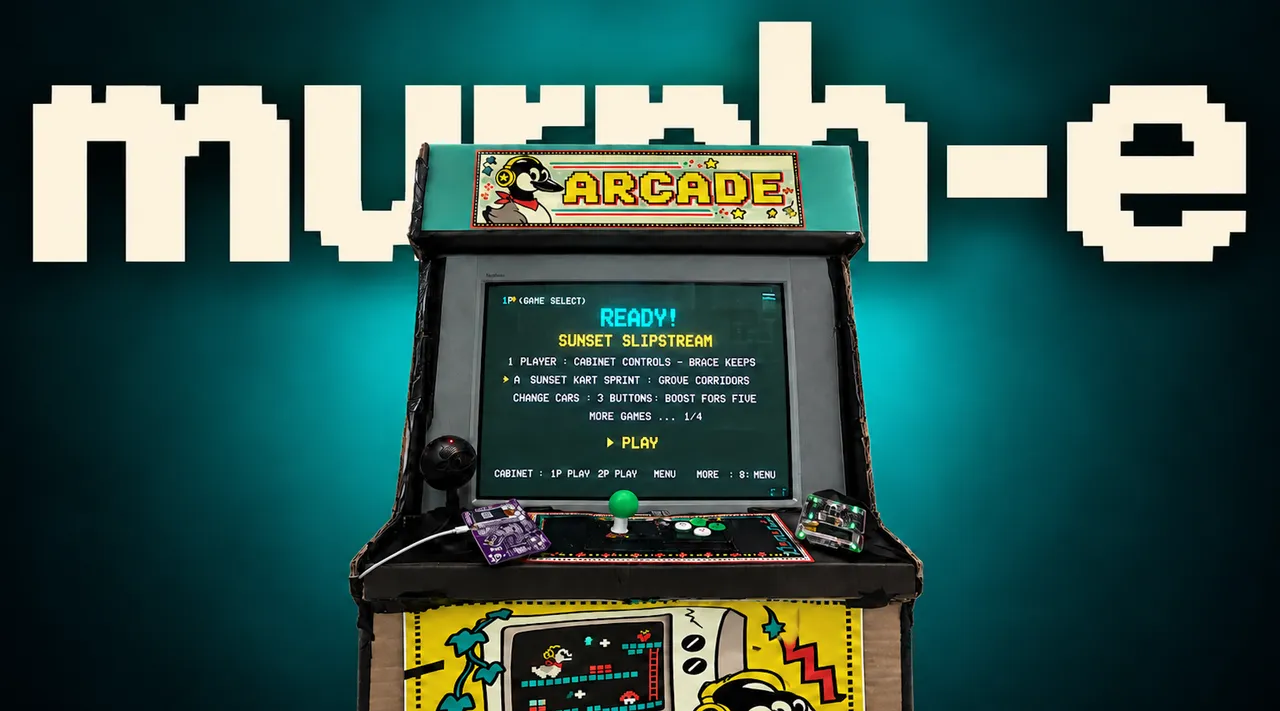
Murph-e — describe a game, play it -

Operation, on a goose -
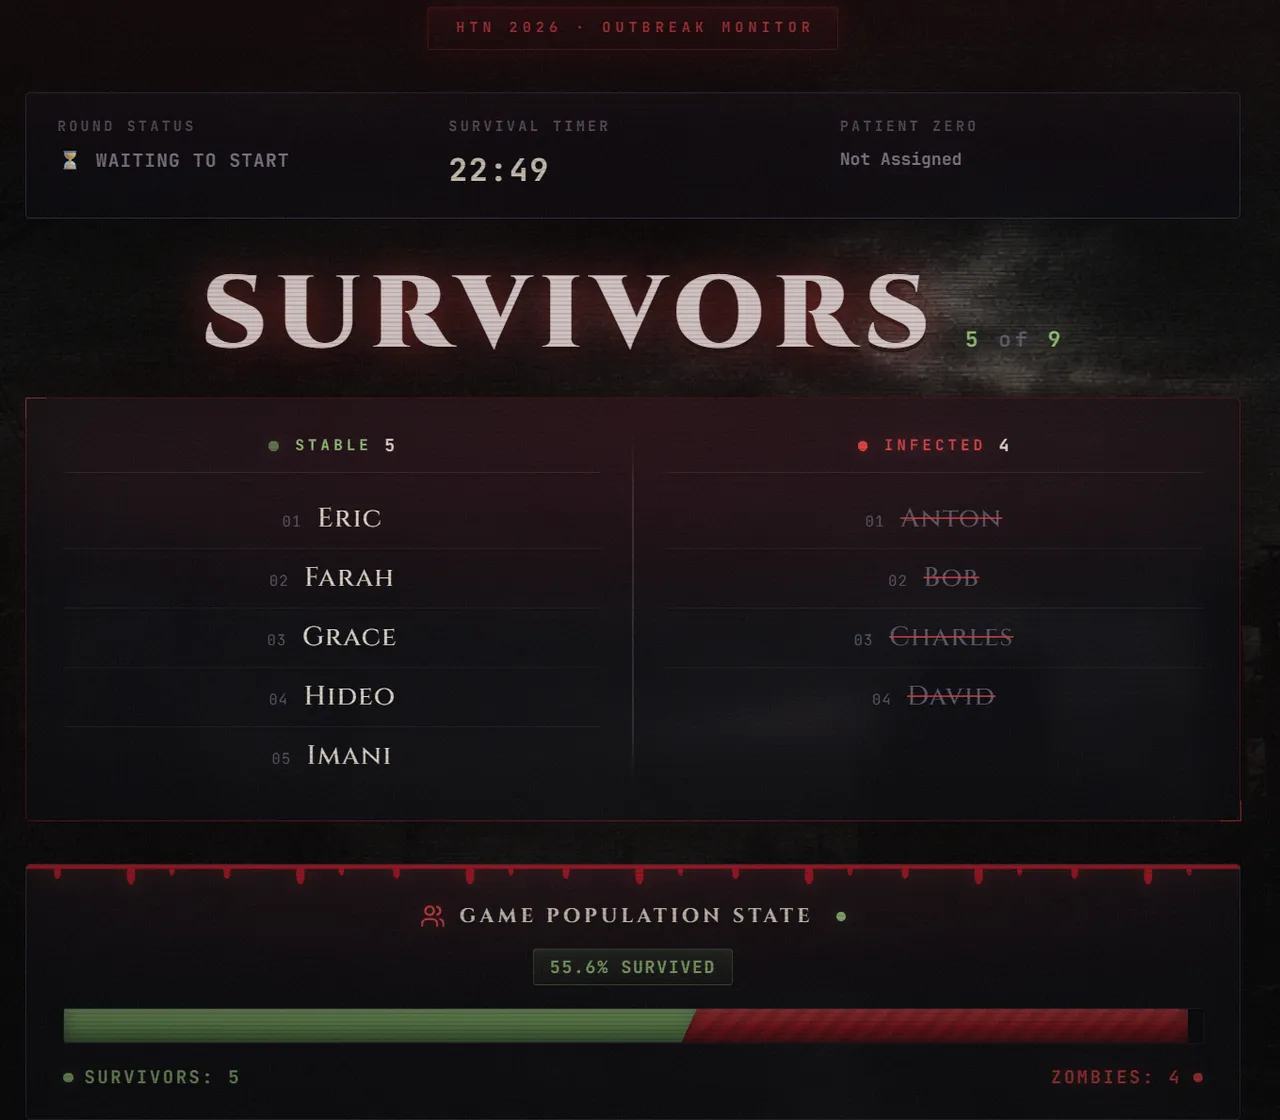
Trojan Badge — a badge-to-badge virus -
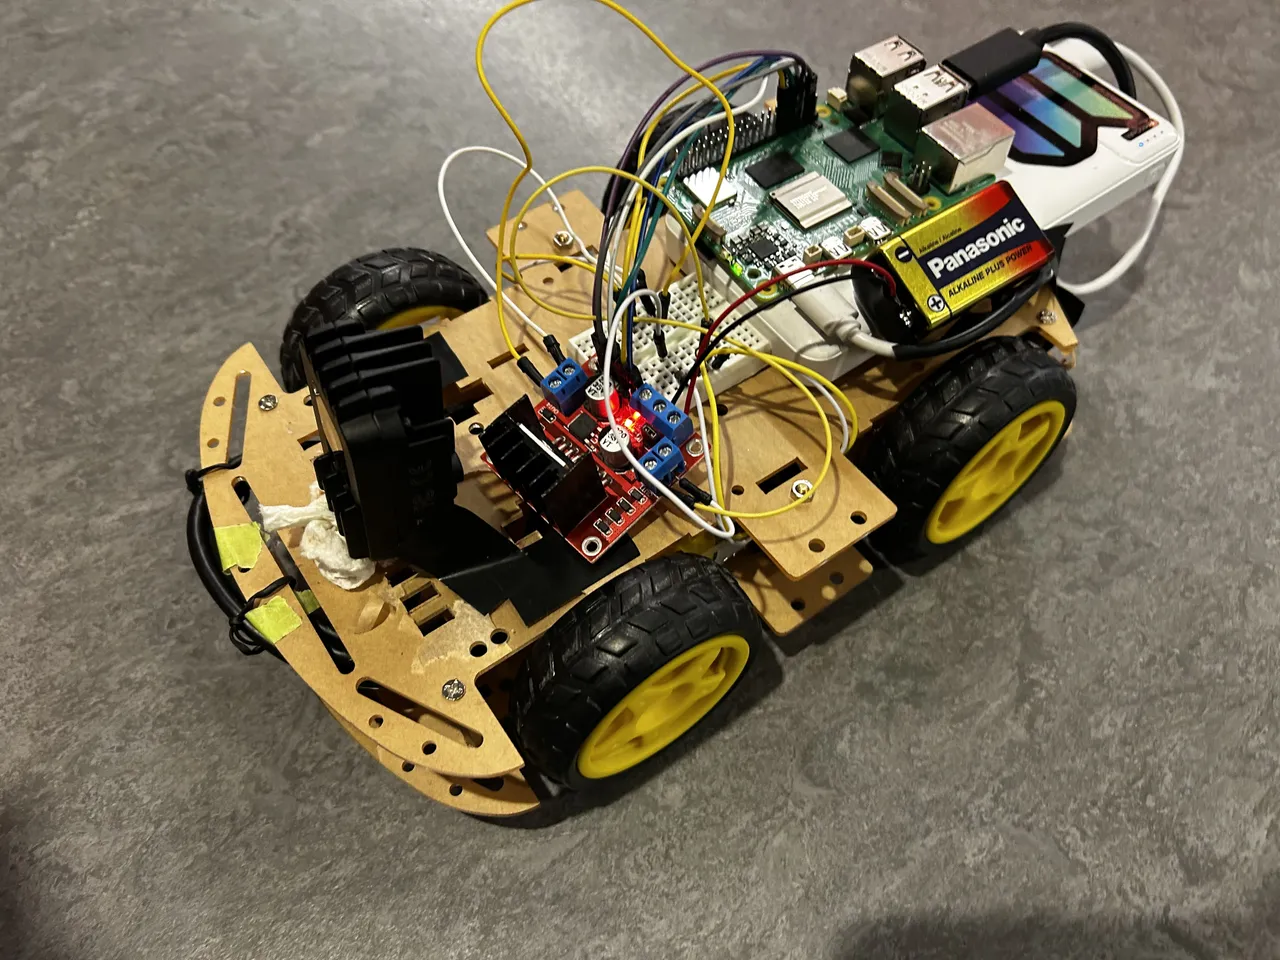
ContROLL — FPV driving on your badge -
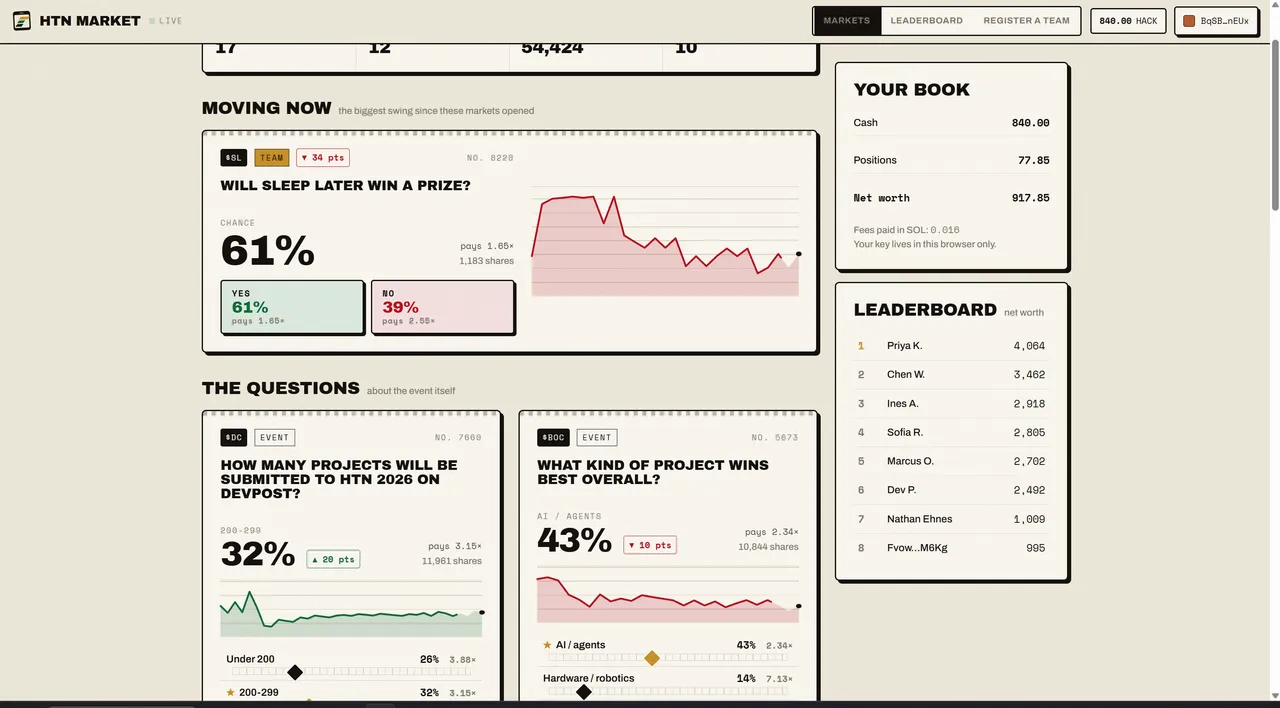
Hedge The North — tap to bet -
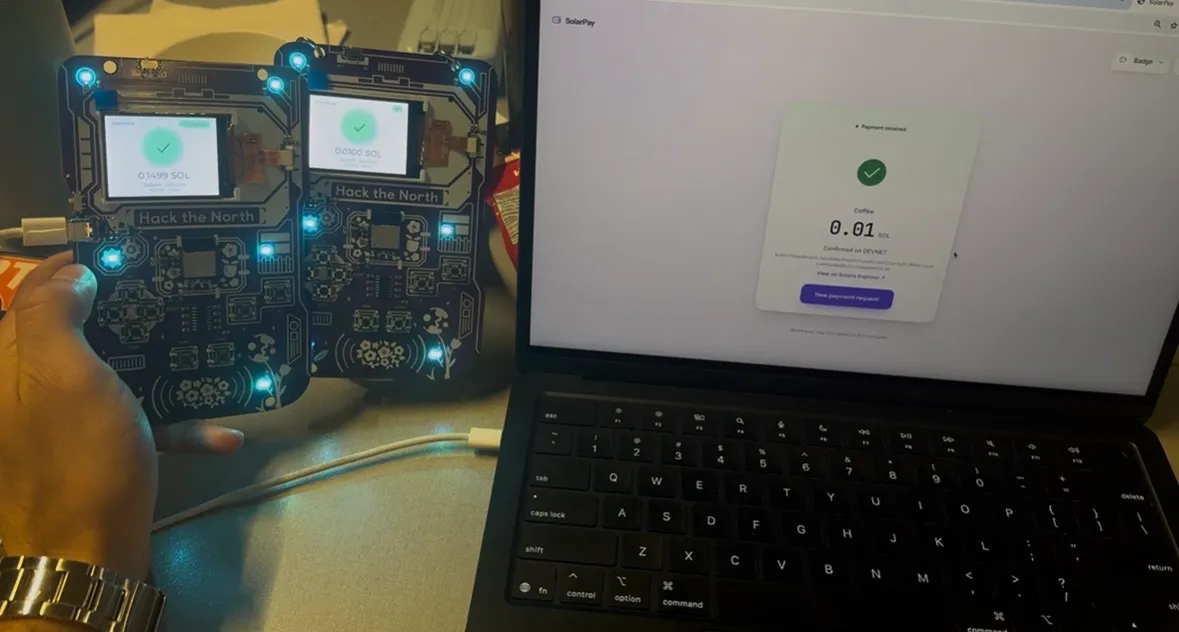
SolarPay — tap to pay -
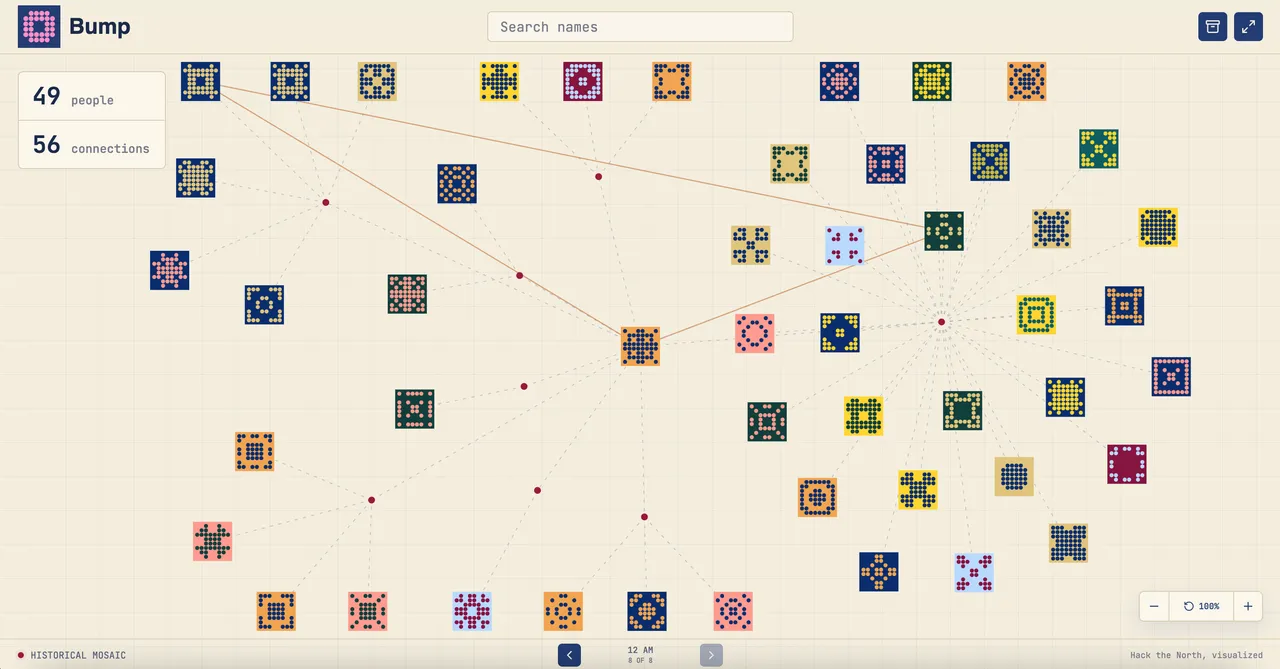
Bump — every connection, mapped -
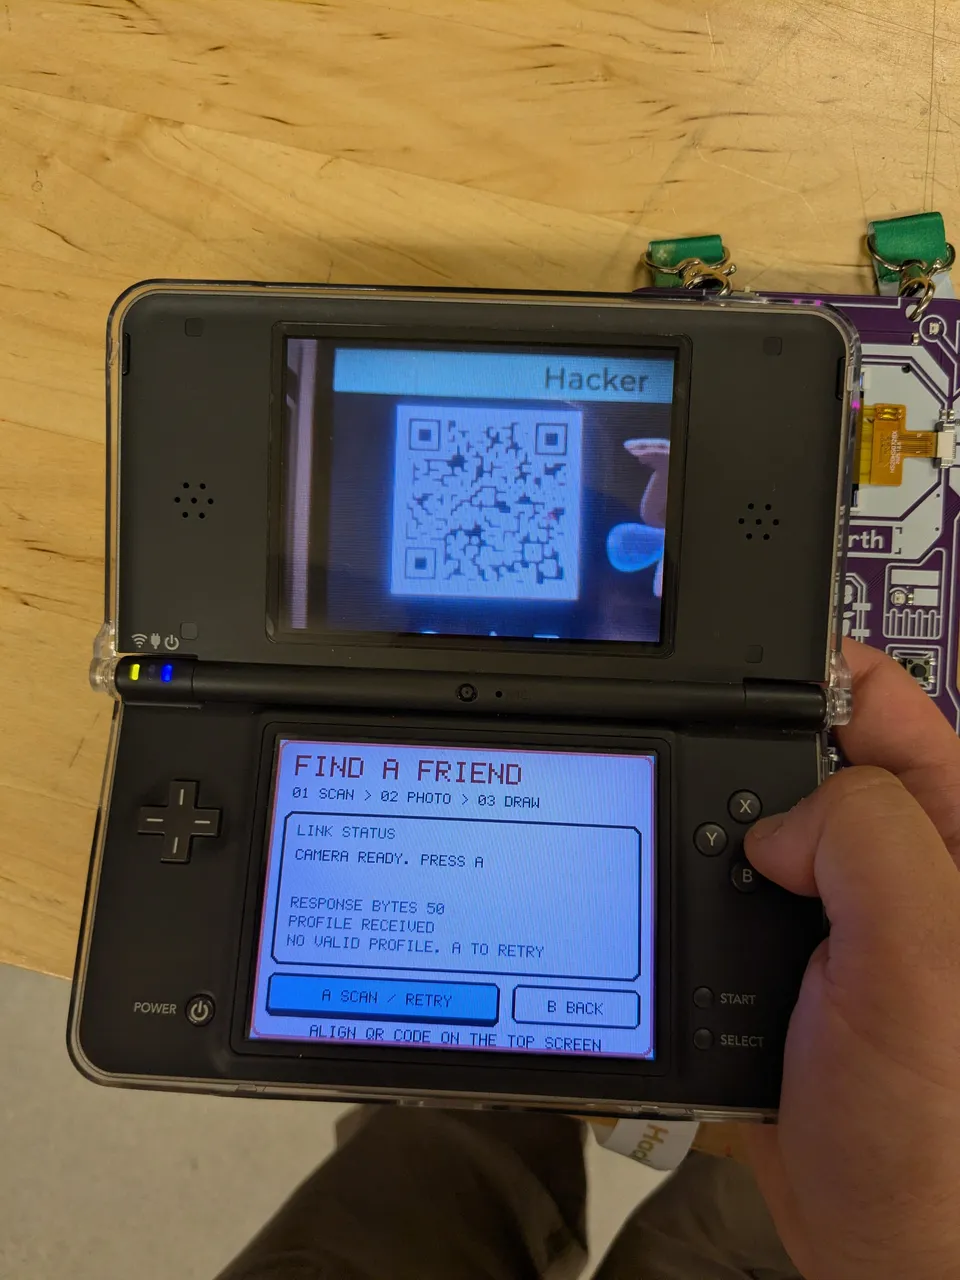
Hack the Dex — a Pokédex of people -
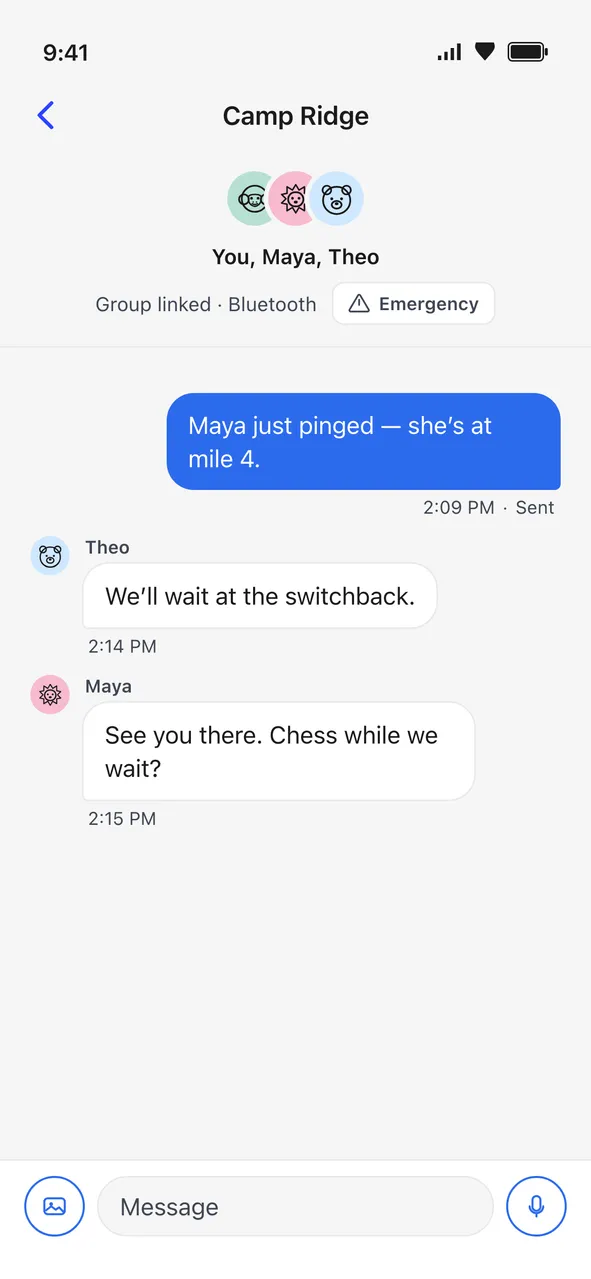
Nored — messaging with no Wi-Fi
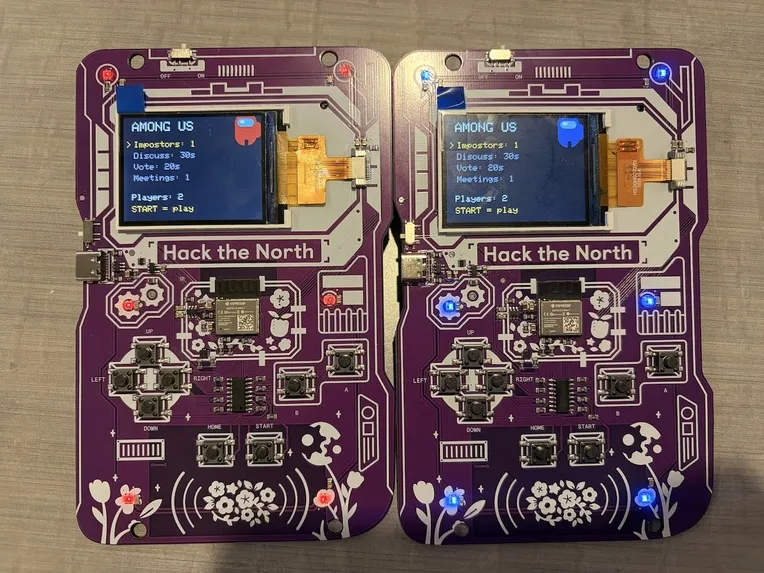
One of the most insane projects we were blown away by was the Among Us project. This team implemented a mesh networked way to play Among Us on the badges using custom firmware. All in one weekend.
The badge project also seemed to have garnered some social media attention. Here are a few of the X posts:
On X
-
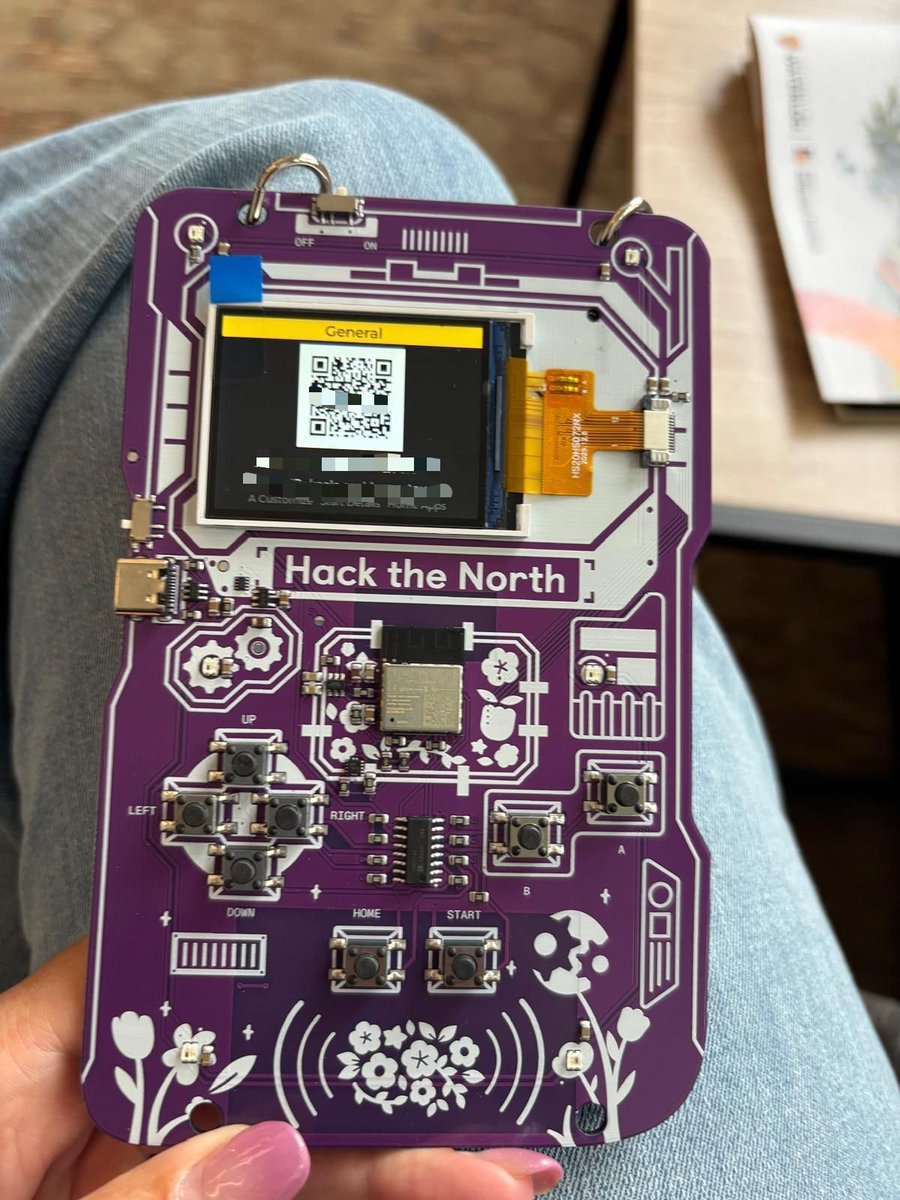
 Alex Scott @afscott solana sponsored a hackathon with the best badges ive ever seen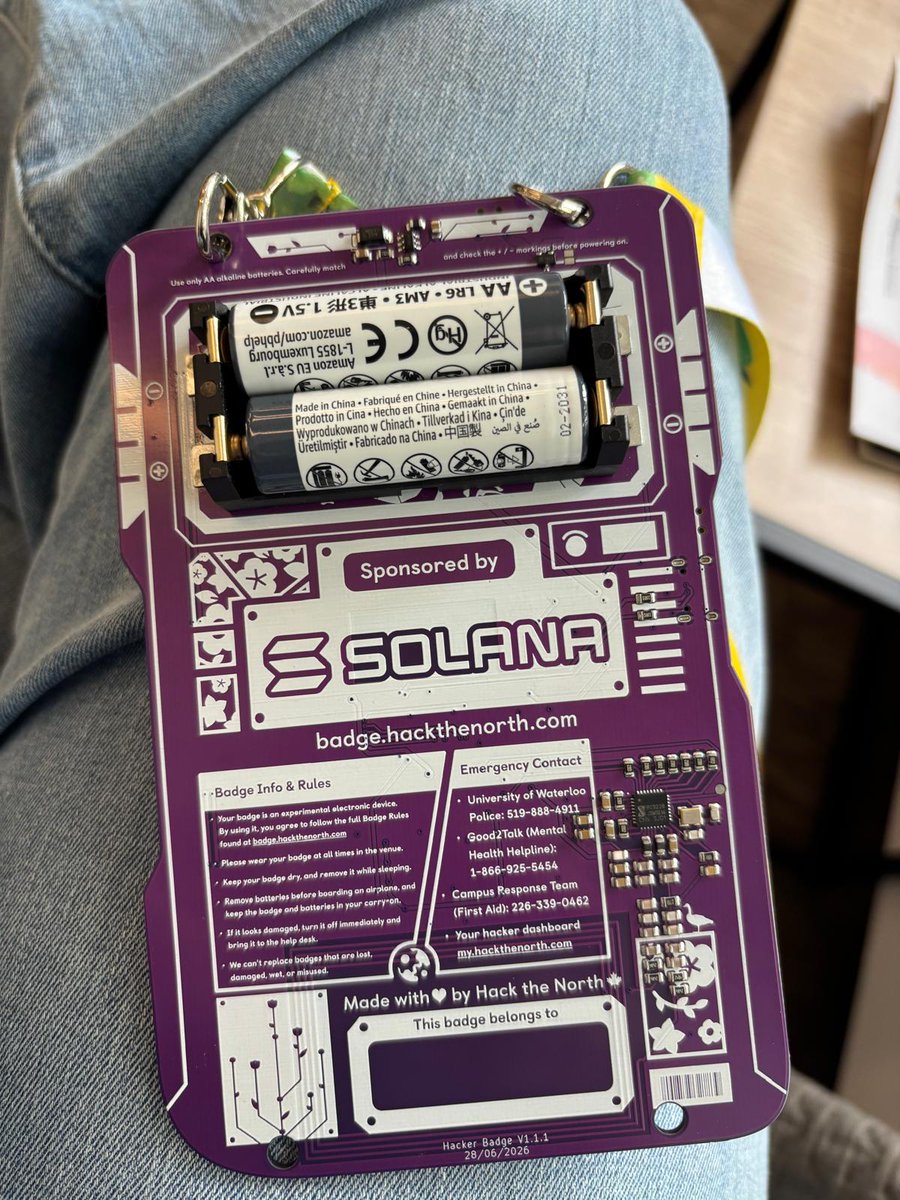
-
 Solana @solana
 -
 Laguna 🌴 @lagunacarta Talked to some teams hacking the badge and they have added:
- custom lights
- Super Mario
- prediction market
- Solana pay
- remote control car control
- sensors that pay via x402
Countless other wild and wacky ideas at @HackTheNorth, I’m ruined for regular conference badges -
 Ryu @RyushenTan Actually the coolest hacker badge I’ve seen, also if you see me stop me to connect badges @HackTheNorth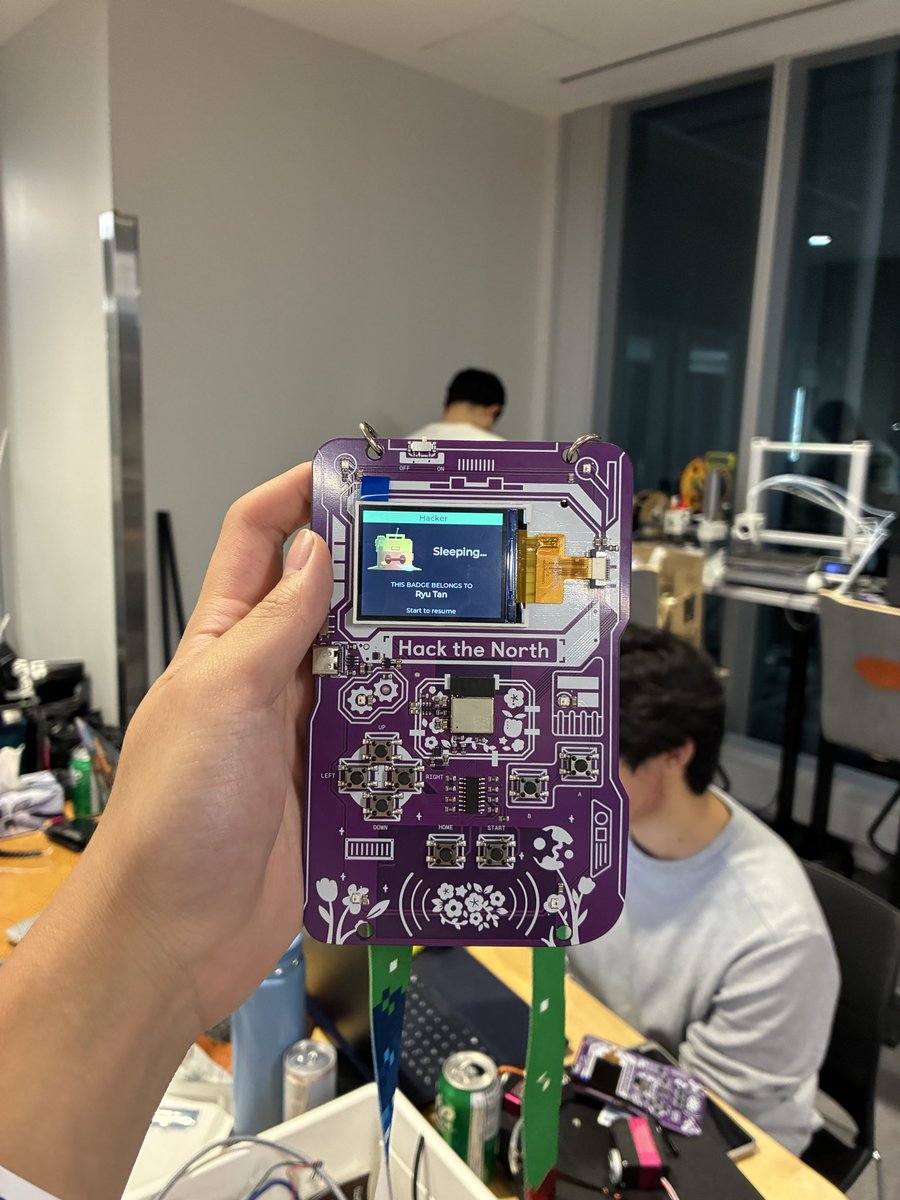
-
 まぐー @magooyyz 先日、夫がウォータールー大学のHack the Northでもらった電子バッジ🪪、こんなん初めて見た!↓
相手のバッジと重ねると名刺交換できたり、参加企業やガイドも見れてなかなか良いけど、後ろに単3電池2個も付いてて首からかけると…まぁまぁ重いっ!😂
イベント終了が深夜0時でシンデレラ帰宅おそっ!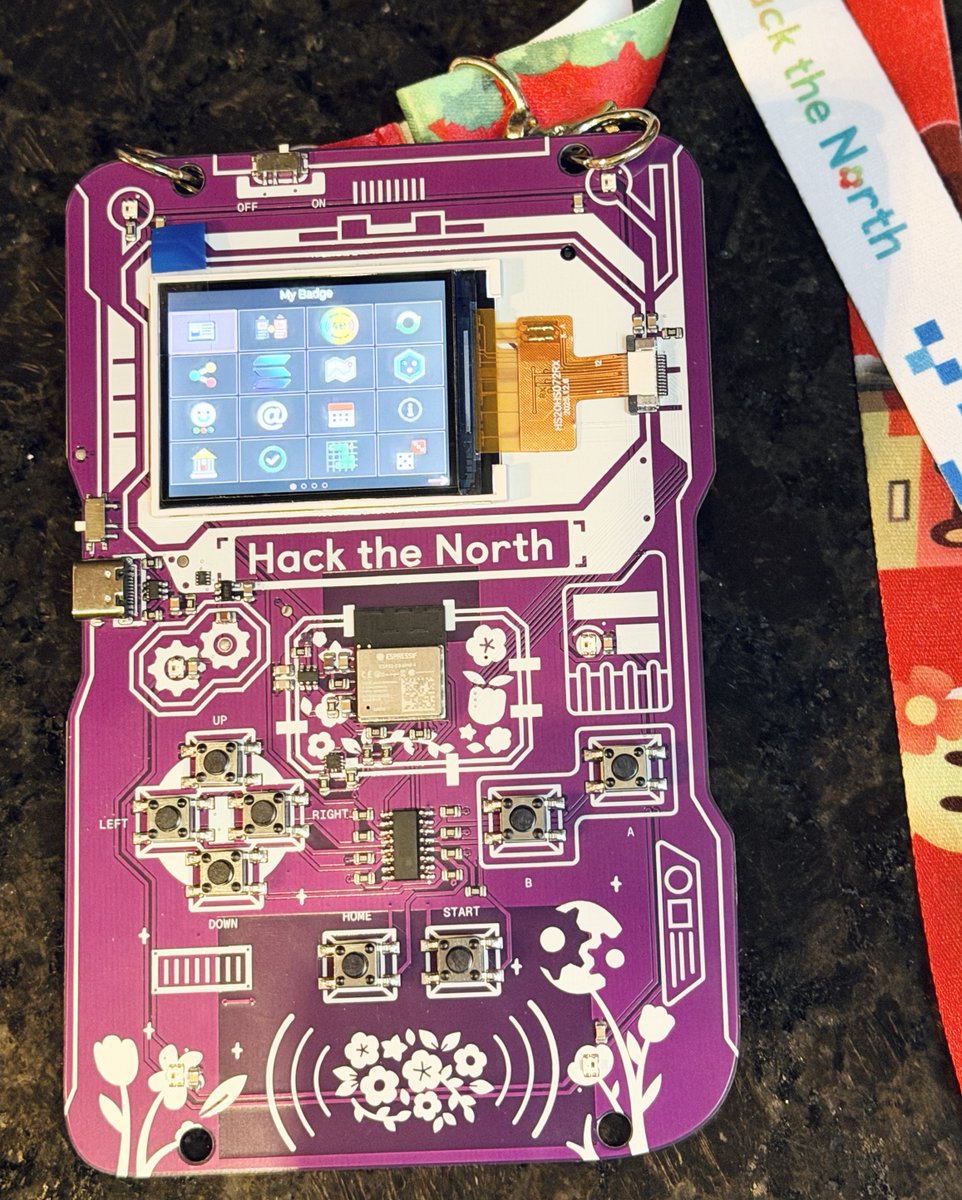
-
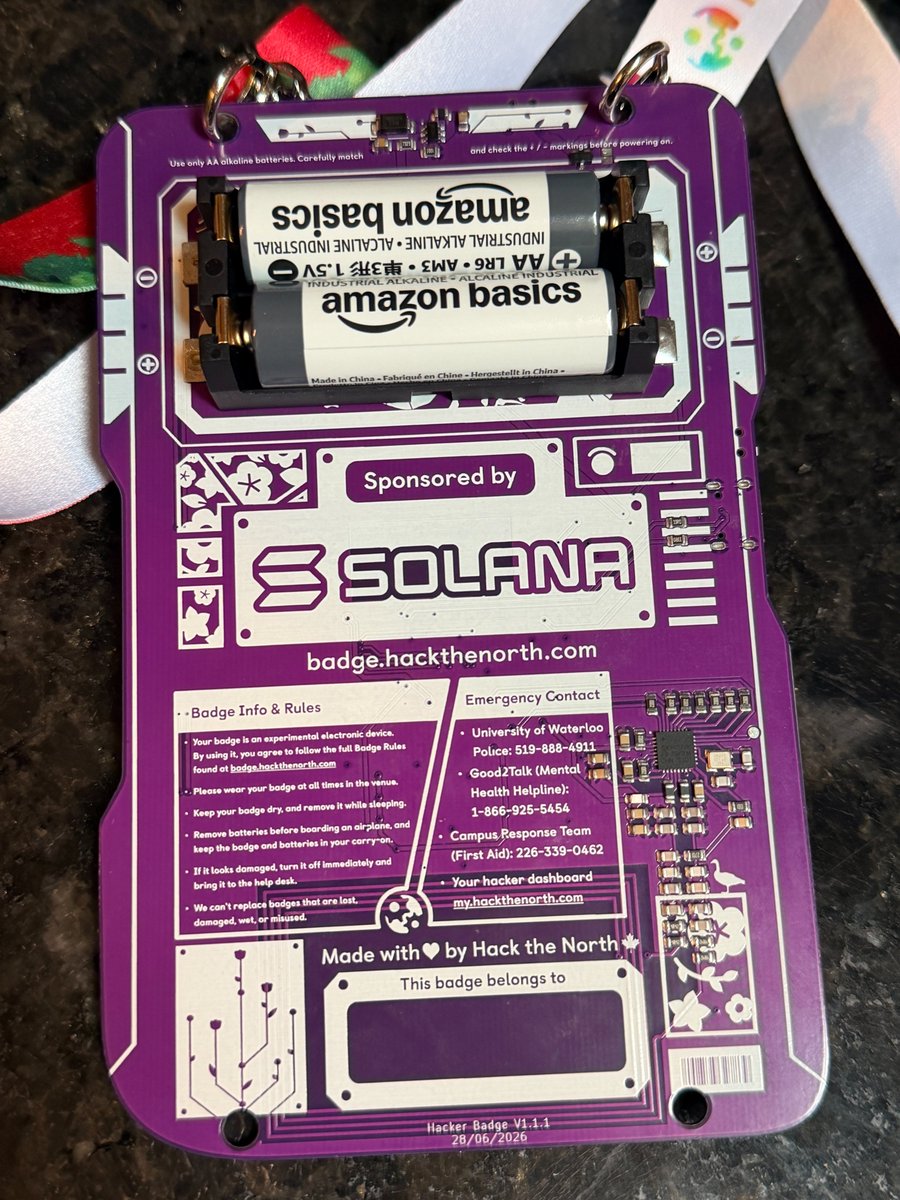
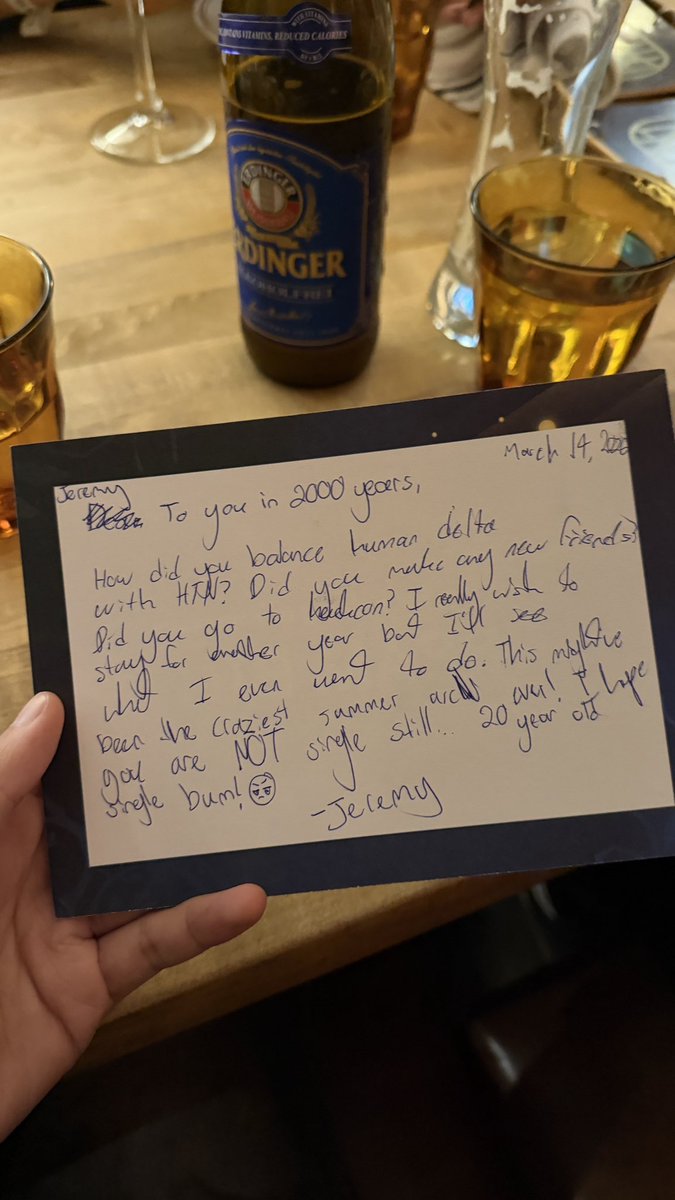
 jeremy @suymerej my last year at HTN is over 🥲
Closing
This is for hackathon organizers:
When we started, hardware badges at hackathons were rare, and I wanted to know why. I think it’s because they look impossible from the outside. They aren’t. We did it with a handful of people, one credit card, and a little grit. The factory is ultimately a web form, the parts are just rows in a table, and mistakes are expensive but survivable.
So here’s my challenge to you: beat us.
Make the colour silkscreen we couldn’t. Build a better power architecture. Integrate the badge better into your hackathon. Add a better radio, maybe even connect to event Wi-Fi. Get a nicer screen. Use a more powerful MCU. Spec it to run Linux. Add a crypt chip. Make it bend or fold.
This post exists to hand you receipts proving it’s possible and a not-so-crazy idea.
I can’t wait to see what you build.
Send me an email any time: nick [-at-] va3ndf.com
Disclosure: JLCPCB and EasyEDA partially sponsored this project. Where things went wrong in this post, the root cause was almost always on my end. They’re a professional fab. I’m a hacker with more ambition than experience.
P.S.
This wouldn’t have been possible without Solana, who sponsored the badge. But they were far more than a sponsor. We worked closely with @spacemandev throughout the project. He built a scavenger hunt into the badge that over 300 people attempted, and he spent the hackathon mentoring hackers on firmware and all things Solana. He felt like part of the team, and we loved having him.
P.P.S.
About Alex, my friend and PM at Hack the North. Put plainly: without Alex, you wouldn’t be reading this.
He was assigned as my PM from the very beginning. My honest first reaction was “great, they’re giving me a babysitter. I guess that’s fair, given how much money is about to get thrown at this.” Boy was I wrong.
Finishing projects has always been incredibly hard for me. If you run ls | wc -l in my programming directory, you get roughly 380. And no, that’s not where I clone other people’s code. Those are all my own projects from 12 years of being a developer. Exactly one of them is finished: Hacker Badges.
Don’t get me wrong, every one of those taught me something, and together they gave me a very broad set of skills. But it would have been nice to ship one. So what was missing from all the others?
Alex.
A project like this put every one of my weaknesses on full display, and Alex jumped in exactly where I needed him and kept me going. He has a line that’s going to stick with me and ruin all my future PMs: “A good PM sees a problem and doesn’t go find someone to complain to. They just fix it themselves if they can.” He lived it. He dove into the firmware directory, cleared out the backlog of polish items, and ended up with more commits than me.
And the badge was only part of it. He managed backend and frontend, and had a hand in nearly every other subteam. Since February, he’s put something like 1,000 hours into making Hack the North magical for hackers, including three hours of calls every single day after work at his internship. At one point he was interviewing for an incredible software engineering job, and on his short lunch break between interviews, he was texting me QA notes on the badge. (He got the job. Obviously.)
People this dedicated to anything, let alone a volunteer-run hackathon, are rare. Hack the North was incredibly lucky to have Alex for three years. The 1,750 attendees wearing his badge probably have no idea, but they were lucky too.
Good luck, Alex!
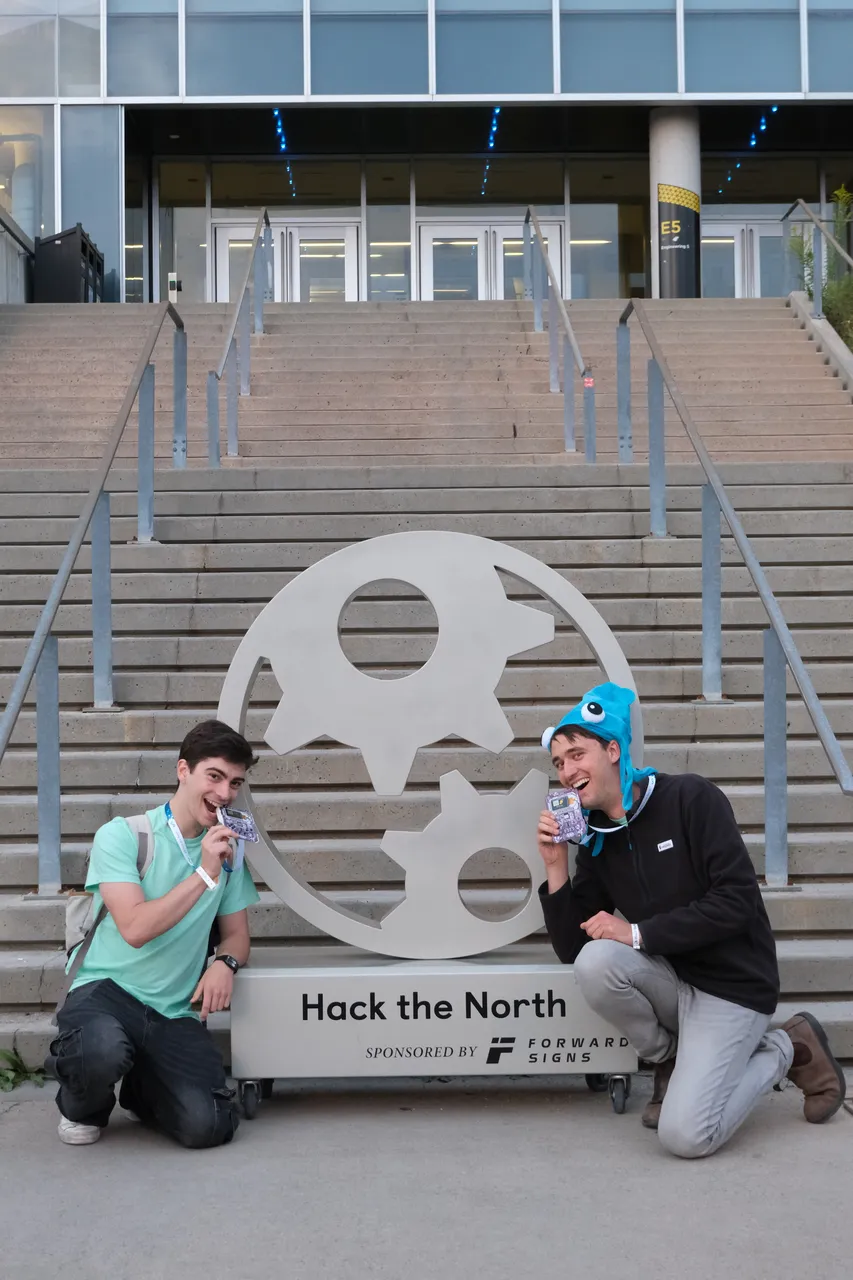
Left: Me, Right: Alex